Introduction
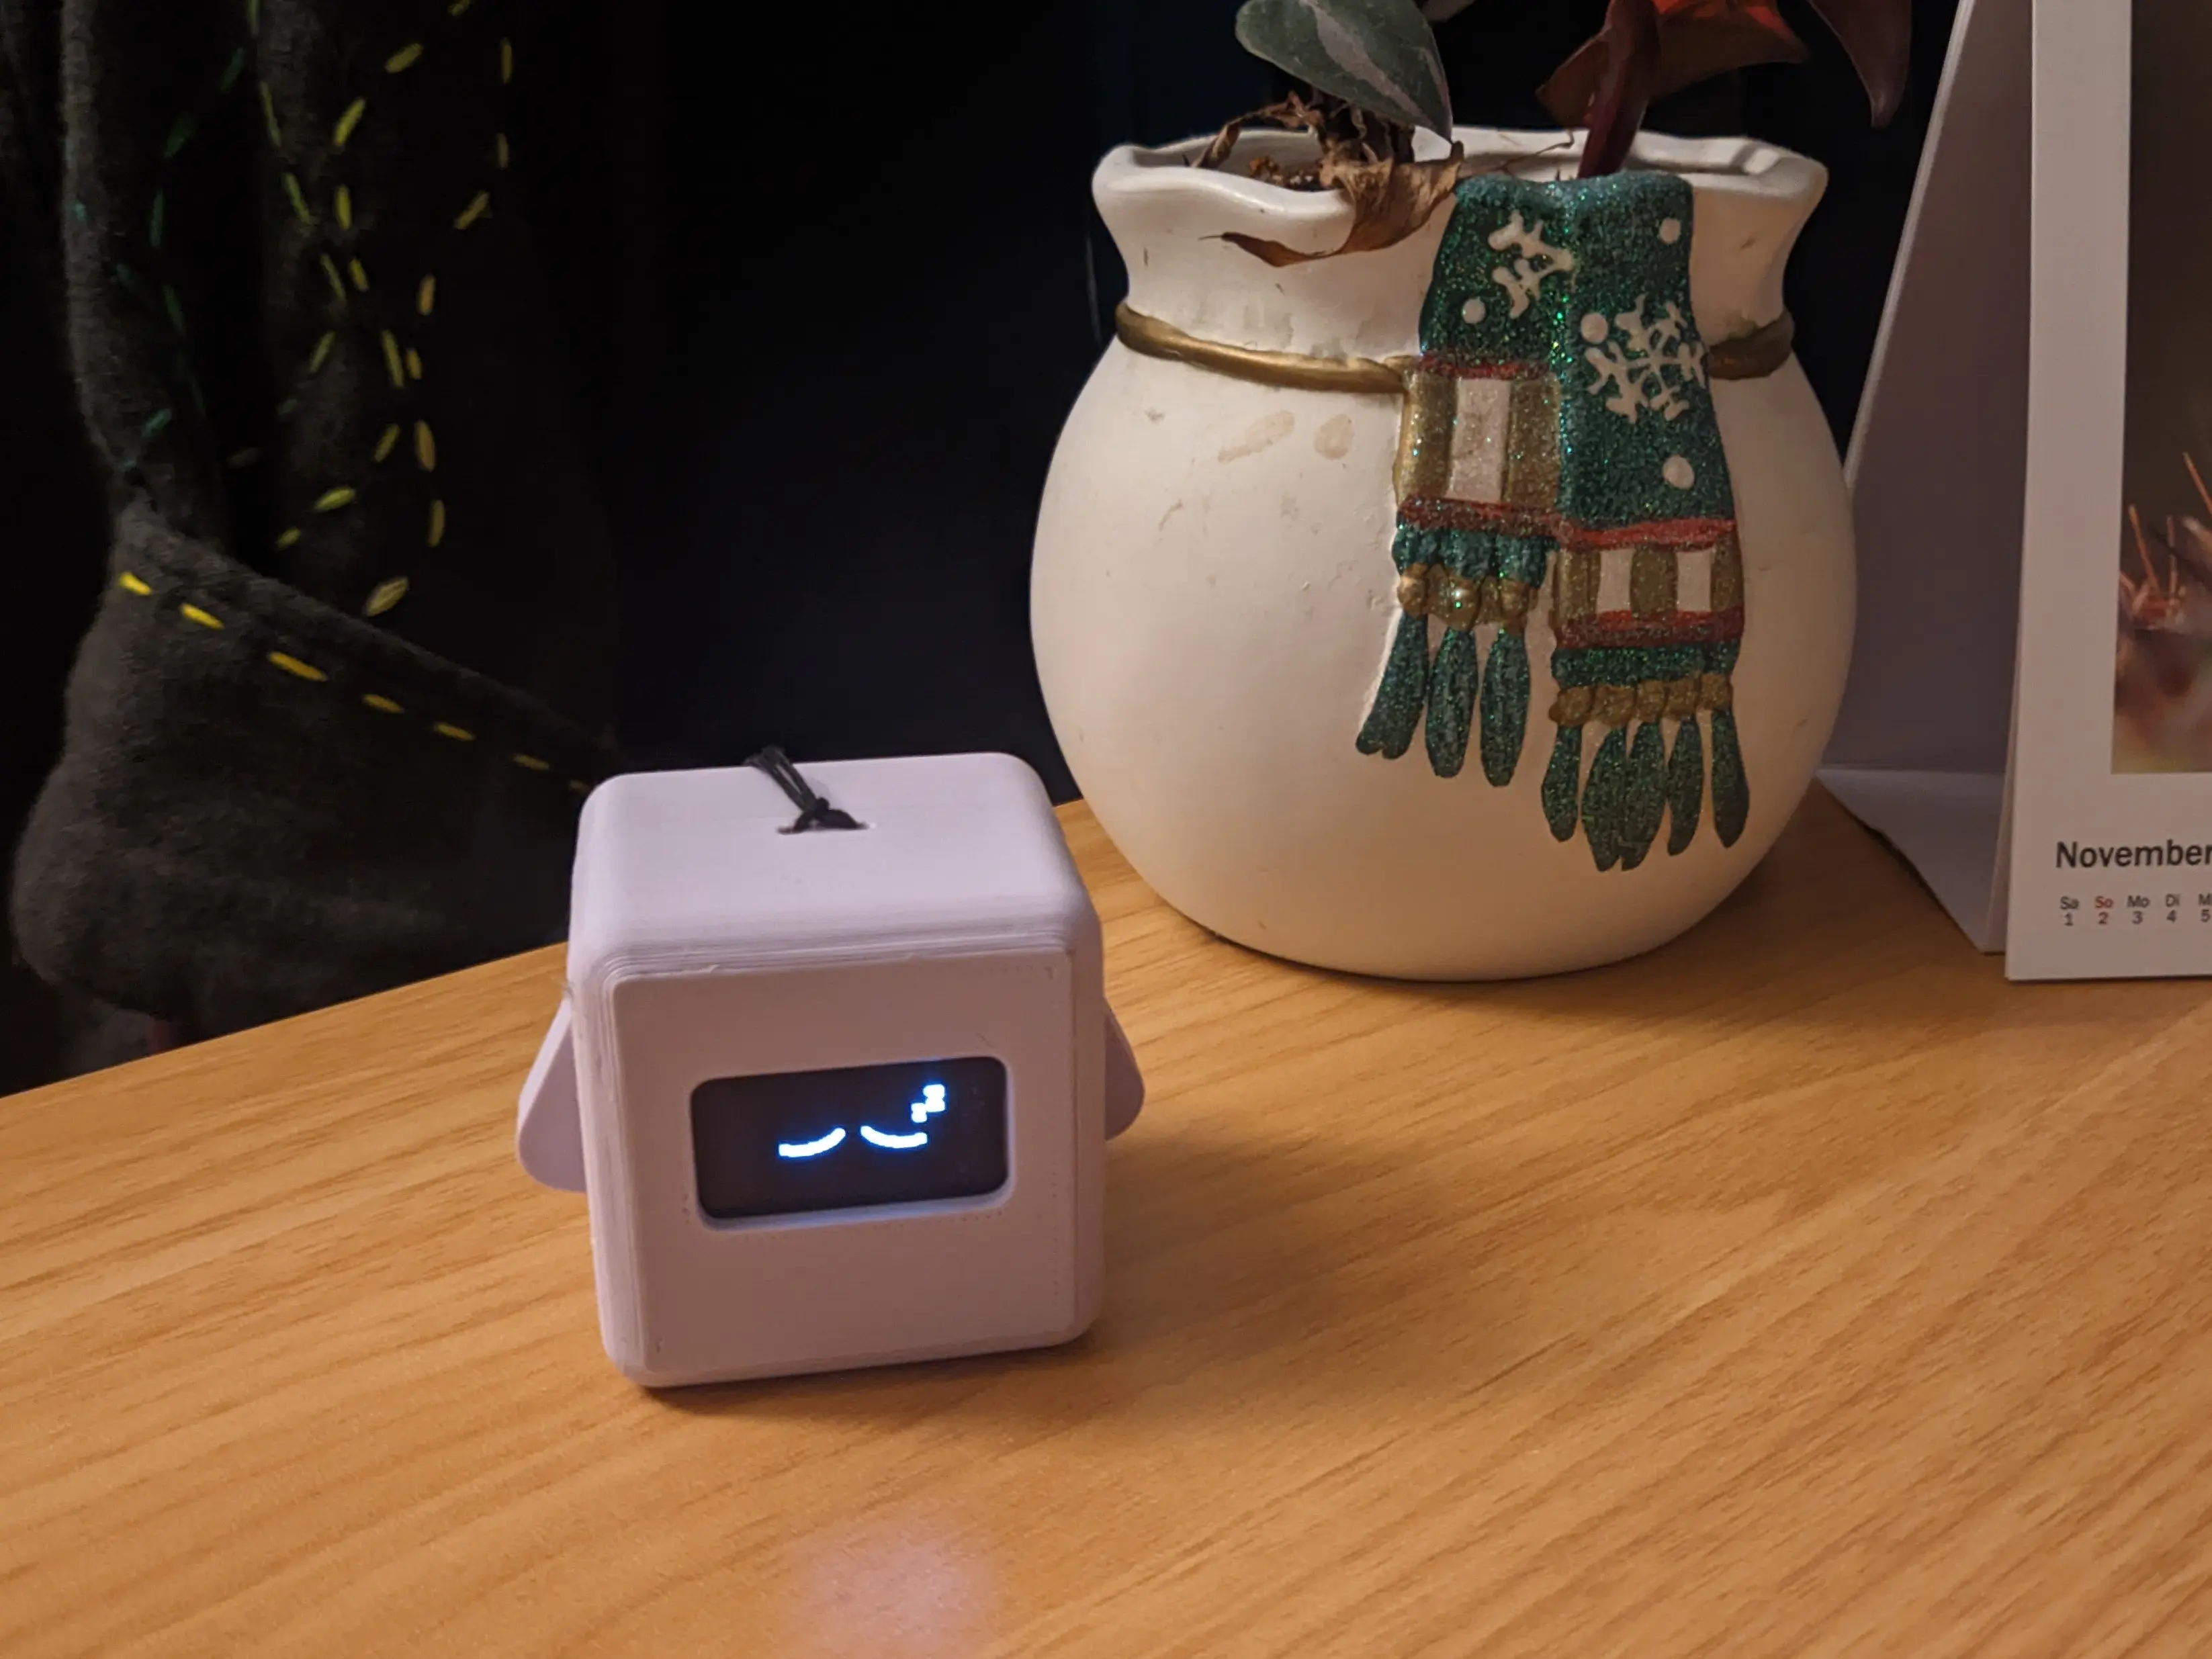
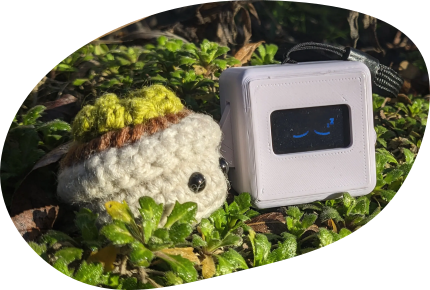
Precious Blocks is your cute every-day companion.
Place it next to you while you work, take it with you to travel.
It’s clicky arms make for a great fidget toy,
and the collection of offline games is great for a little distraction
or if you need to kill some time.
Precious Block also really enjoy just hanging out together;
it is really good at looking cute doing nothing.
Precious Blocks is entirely open-source,
including the firmware, hardware and optional companion server.
You can even contribute to the website or this book (docs), both licensed under CC-BY-SA 4.0.
Feel free to build your own block or customize the firmware.
This documentation is split into multiple parts.
- The User Guide is supposed to give you an introduction into how to use the block, and the features available.
- The DIY Guide gives you an overview over the hardware and how to build your own block.
- The Hacker Guide covers the firmware aspect and how to contribute to it
Feel free to pick the chapters that interest you the most.
You can also use the side menu on the left to jump between chapters
or the search function to find what you are looking for.
Overview
Precious-Block is desinged to keep you company throughout the day.
Be that keeping you company while you work (it does an amazing job at looking cute on your desk) or as a fidget toy, when you travel or need a distraction.
It comes with muultiple offline-features (including a Clock & Games)
and some online helper tools (i.e. Weather).
Where possible, the internet-connectivity is optional,
allowing you to access cached data on-the-go.
This chapter focuses on the official Precious-Blocks firmware,
introducing you to navigation gestures and the available apps.
Note that the availability of certain features depends on the hardware configuration and settings of your block.
Parts
To better understand the following chapters, it might be helpful to familiarize yourself with the naming of the different component of the block.
On the front of the Precious Block is the Display.
You can interact with the block by pressing or holding the arms on either side.
You can charge your Precious Block by plugging a USB-C cable into the port on the back.
This port also allows you to access debug output or flash firmware files, if you want to.
Both the Boot and the Reset button of the internal microcontroller are exposed on the bottom.
They are especially useful if you want to access bootloader features of the device.
Ideally you should never need to use them, but the Reset button might be handy if the block freezes entirely.
If you want to attach a wrist band, you can easily loop it through the looped holes on the top.
Basic Usage Flow
When you start the block, it enters sleep mode.
The block will happily stay in sleep mode until you decide to wake it up.
Because most parts are asleep in this mode, it also preserves battery life.
You can use the arms to interact with the block.
Wake the Block
You can wake the device by pressing and holding both arms until the screen goes blank and the block vibrated.
After releasing the arms, you will be dropped into the menu.
(Menu navigation is covered in the upcoming Basic Navigation chapter.)
If you spend too much time idle in the top level menu, the block will go back to sleep, as it was when you first powered it up.
Gestures
All applets except the games use the same Gesture system, to make navigation as easy and consistent as possible.
The left arm is responsible for navigating left (or lowering the value),
where as the right arm is used for navigating right (or increasing the value).
Both arms use the same gesture system:
Click the arm once to move into the corresponding direction
or hold the arm and it will continue sending the click event, allowing you to easily move long distances without having to click the arm a bunch.
Besides the single-arm gestures,
there are more gestures available by pressing both arms at the same time.
Pressing and releasing both arms together briefly is used to confirm the current selection.
Pressing both arms for a long period of time (more than 1 second) counts as a long press and is generally used as a back gesture.
Recovering
In an ideal world, the firmware should never panic.
But if it ever should, you should be able to restart the block by pressing one of the arms.
If this doesn’t work, you can use the reset button on the bottom of the block.
Background Jobs
When the block is asleep, it will periodically wake itself up,
to perform background tasks like updating weather data (if configured).
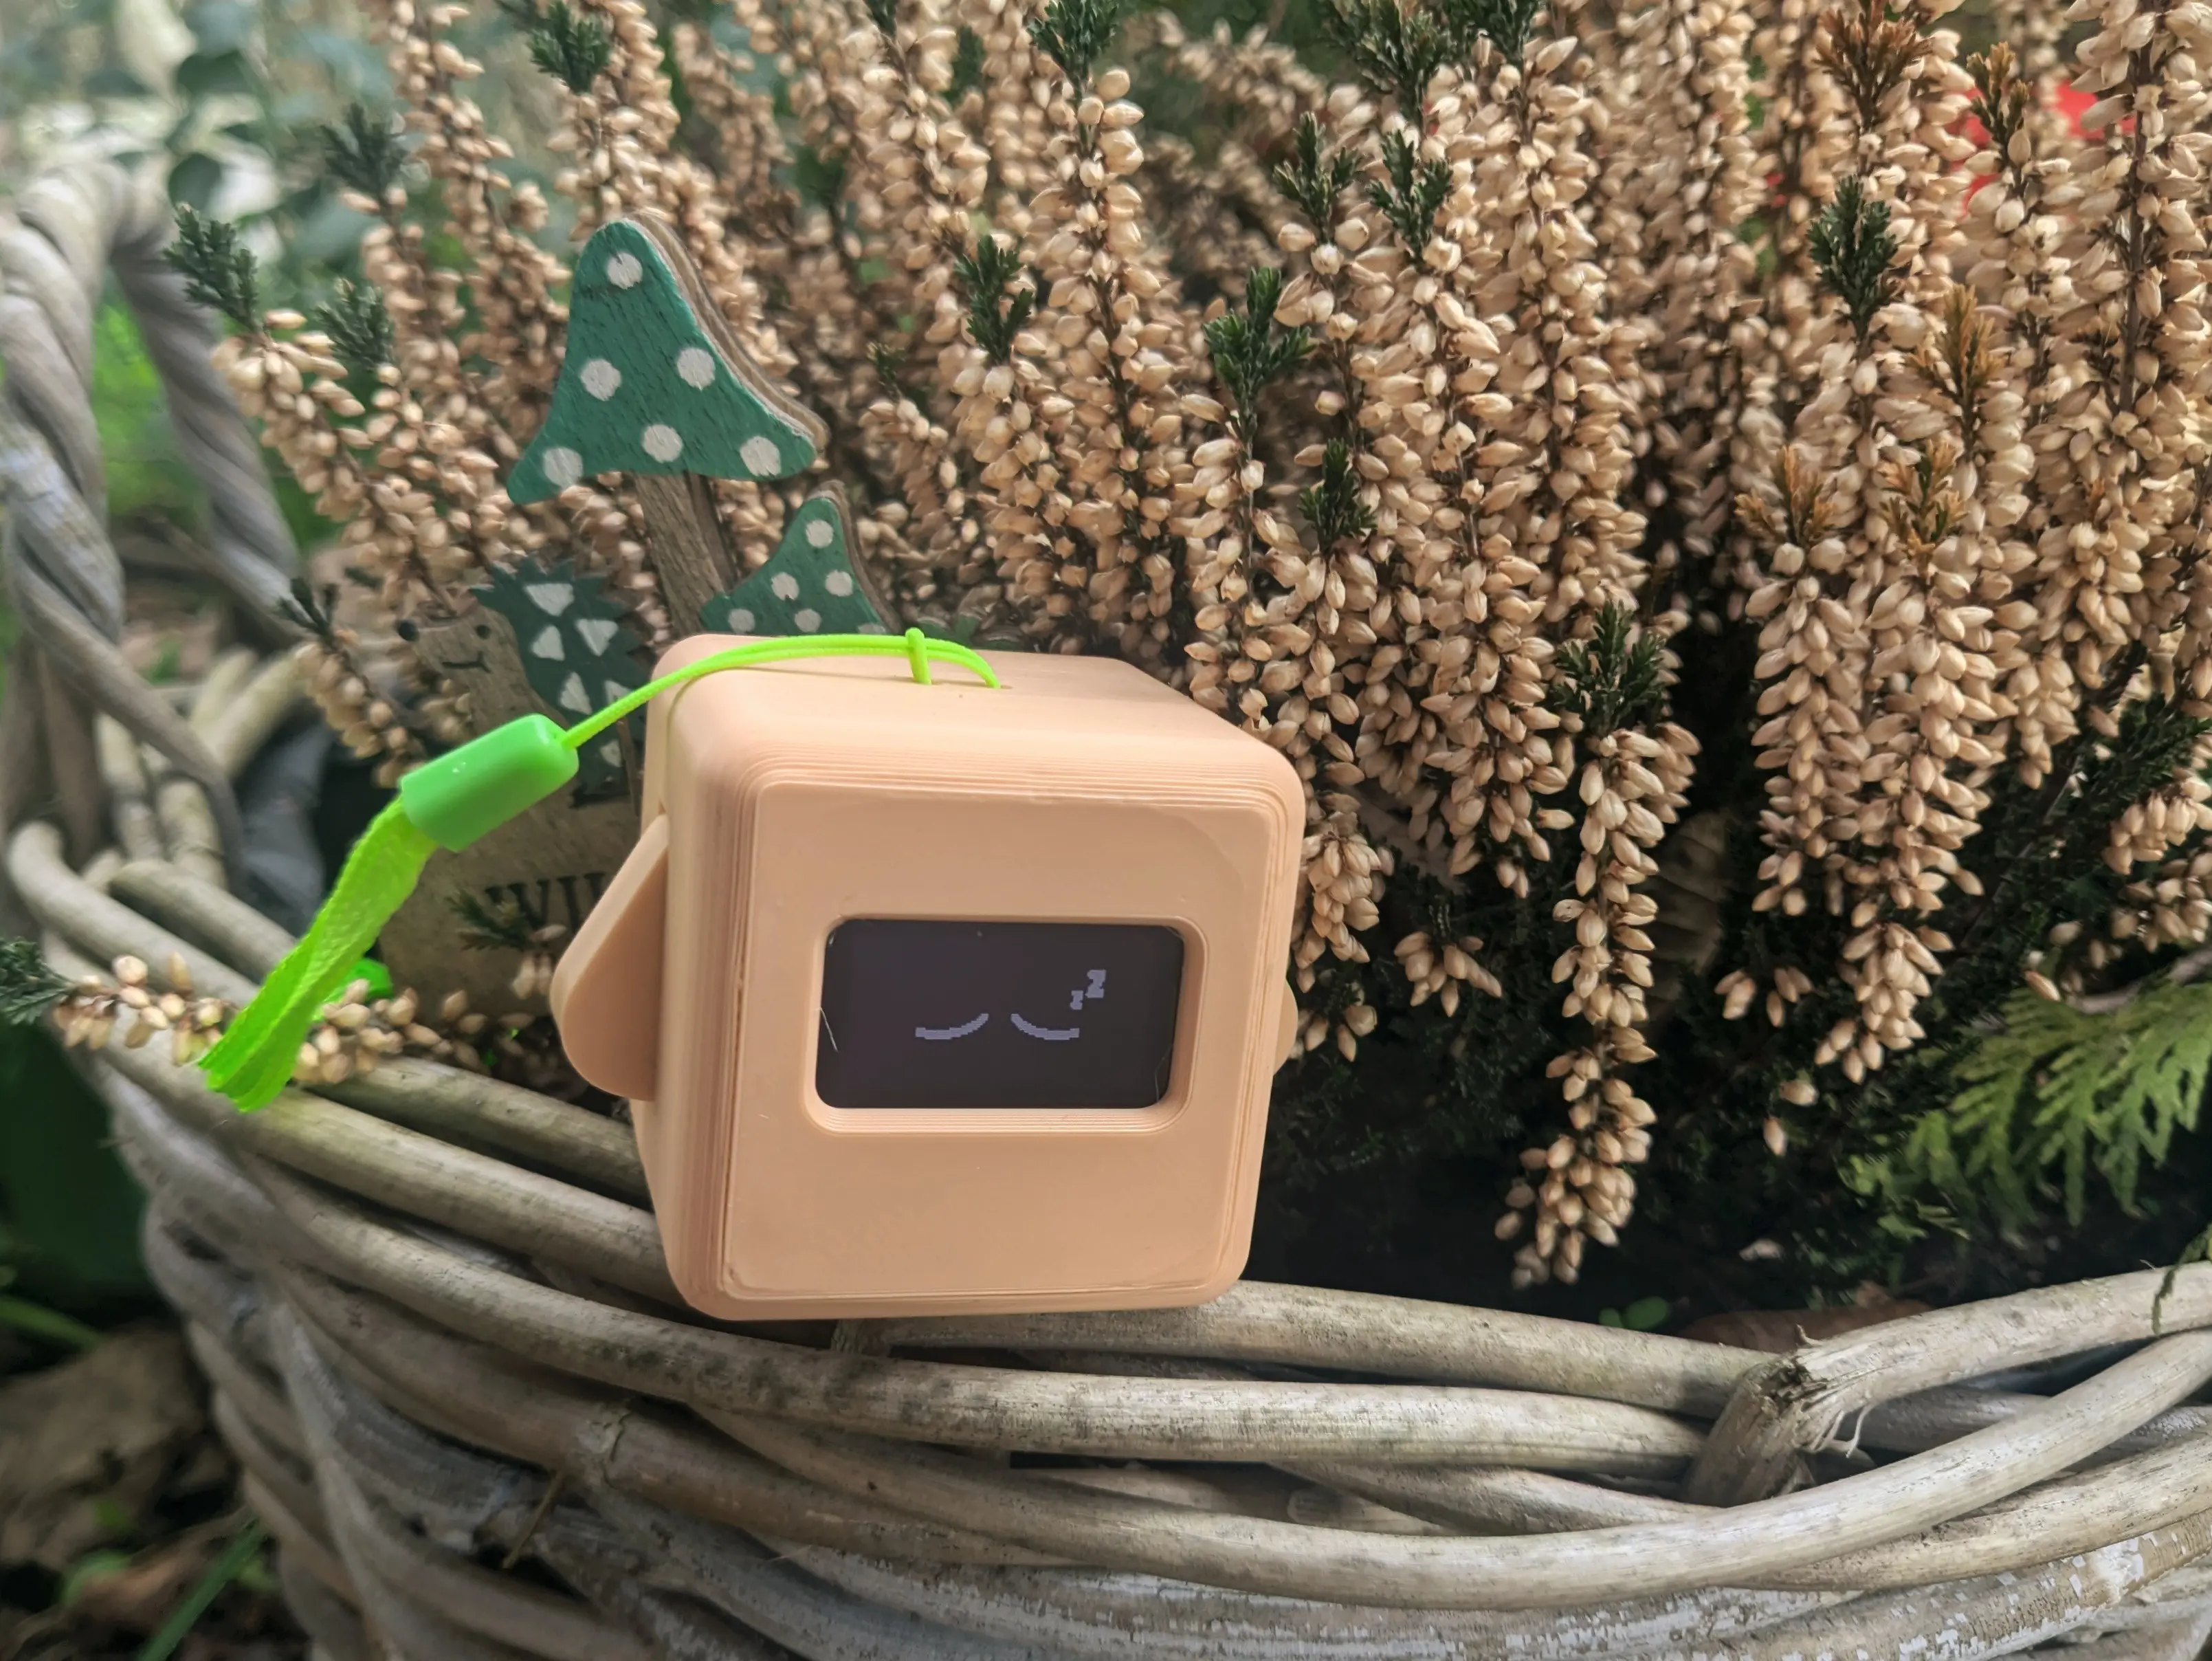
Whilst performing background tasks, it displays an eyes emoticon.
Applets
Applets are apps that can be launched from the menu.
They provide different functioncality, like time, weather or games.
Navigating the Menu
The menu itself is structured into multiple layers to group logically related programs together.
The menu interactions are the same for all layers.
As indicated by the arrows on either side of the screen,
you can use the arms to cycle through the menu entries.
To select a specific entry, you can briefly press both arms and release them.
Nested menus have an additional Back option, indicated by an arrow pointing left.
You can select it, as you would with other menu entries to return to the previous menu.
Games
Precious Block comes with multiple games you can play, when you are on the go or just need a distraction.
Pong
Pong is a single player game, where you control both paddles at the same time.
To do so, the paddles are linked in an inverted configuration.
This means that as one paddle moves up, the other one moves down.
You can move the right paddle up (and left paddle down) by holding the right arm.
To move the right paddle down (and left paddle up) you hold the left arm.
The goal of the game is to bounce the ball of both paddles, without the ball ever touching the left- or rightmost screen edge.
Once you reach the game over screen, you can press any arm to return the menu.
Plane
A FlappyBird inspired game, where you have to navigate a small ball through pipes.
You can flap the bird by pressing both arms at the same time.
When you collide with a tube, the game is over and shows the number of tubes cleared.
The game is designed to be fairly friendly, both in terms of collission detection and with tube spacing.
Clock
The clock applet provides time-related functionality.
It is organized as part of the menu structure and shows the current time and date as a menu entry.
You can navigate off of the clock display using the arms and selecting the other functionality from the other pages.
Timer
The timer applet allows you to select a duration using the number selector.
When you start the countdown, it updates the display until it reaches 0.
Once the timer elapses, the block will start vibrating and the original time will be shown.
Weather
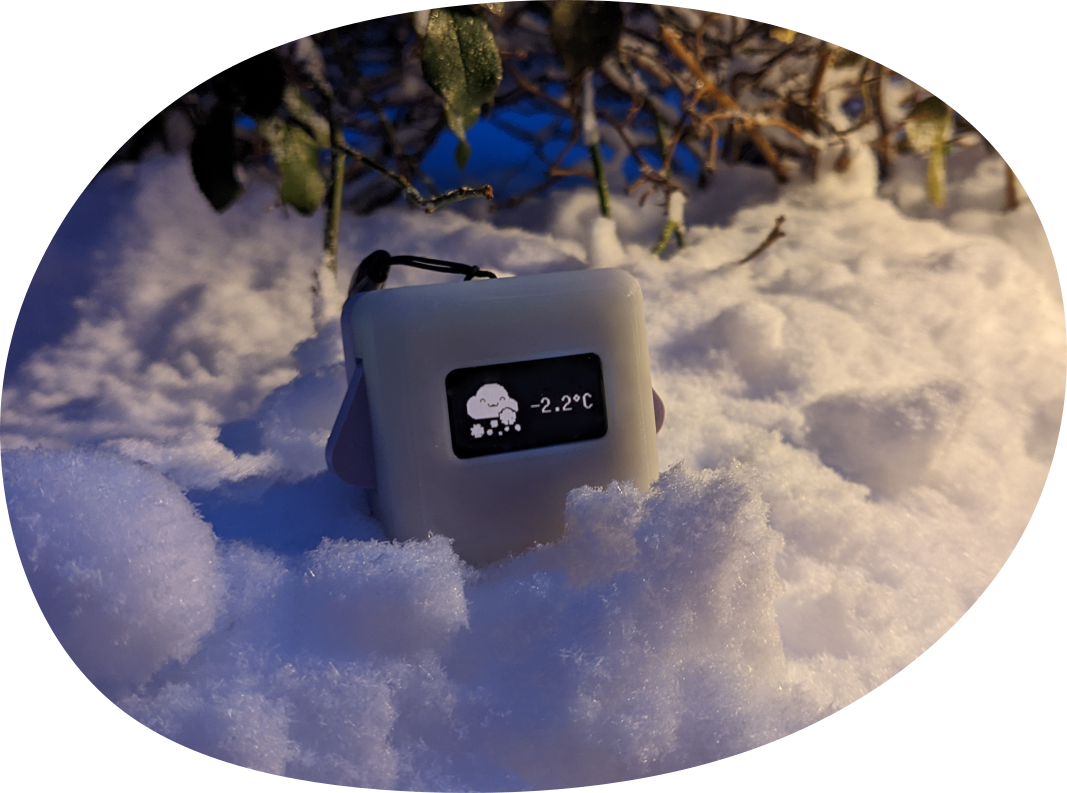
The weather applet fetches current data fram Open Meteo.
The hourly data is stored locally for the next 5 days and updated whenever the block has an active internet connection.
That way you can check the weather when you are on the go.
The applet consists of two pages.
The first page shows a weather indicator symbol and the current temperature.
The second page shows more detailed information about current temperature, wind and precipitation.
You can switch between the pages using the arms. To exit the app press long click both arms.
Breathing
The breathing applet is ment to help you calm, by guiding you through breathing exercises.
Every breathing exercise is made up of four parts, which can be repeated as often as you like.
- Inhale
- Hold (1)
- Exhale
- Hold (2)
You can either choose your own intervals (Custom) or choose from one of the prebuilt patterns.
They were inspired by the breathing-timer.com patterns.
- Box (Inhale 5 seconds, Hold 5 seconds, Exhale 5 seconds, Hold 5 seconds, Repeat)
- Relax (Inhale 4 seconds, Hold 7 seconds, Exhale 8 seconds, Repeat)
- Focus (Inhale 5 seconds, Hold 5 seconds, Exhale 5 seconds, Repeat)
After configuring your pattern, you can choose how many times you want to repeat the exercise.
The display will then show the current action to fulfil, with a progress bar, for how much longer you have to go in that segment.
Settings
You can configure device behaviour in the setting applet.
This includes time, WiFi, Companion server login details, location data, brightness and more.
It also allows you to update the firmware on the block when connected to the internet.
Overview
This chapter focuses on how you can build your own Precious Block from scratch, using the exact same components I used to build mine.
Including materials required and the step to assemble them correctly.
You can find the hardware source files on Codeberg, licensed under the CERN Open Hardware Licence Version 2 - Strongly Reciprocal or later license.
Components
To be able to build your own block, you have to source all required parts.
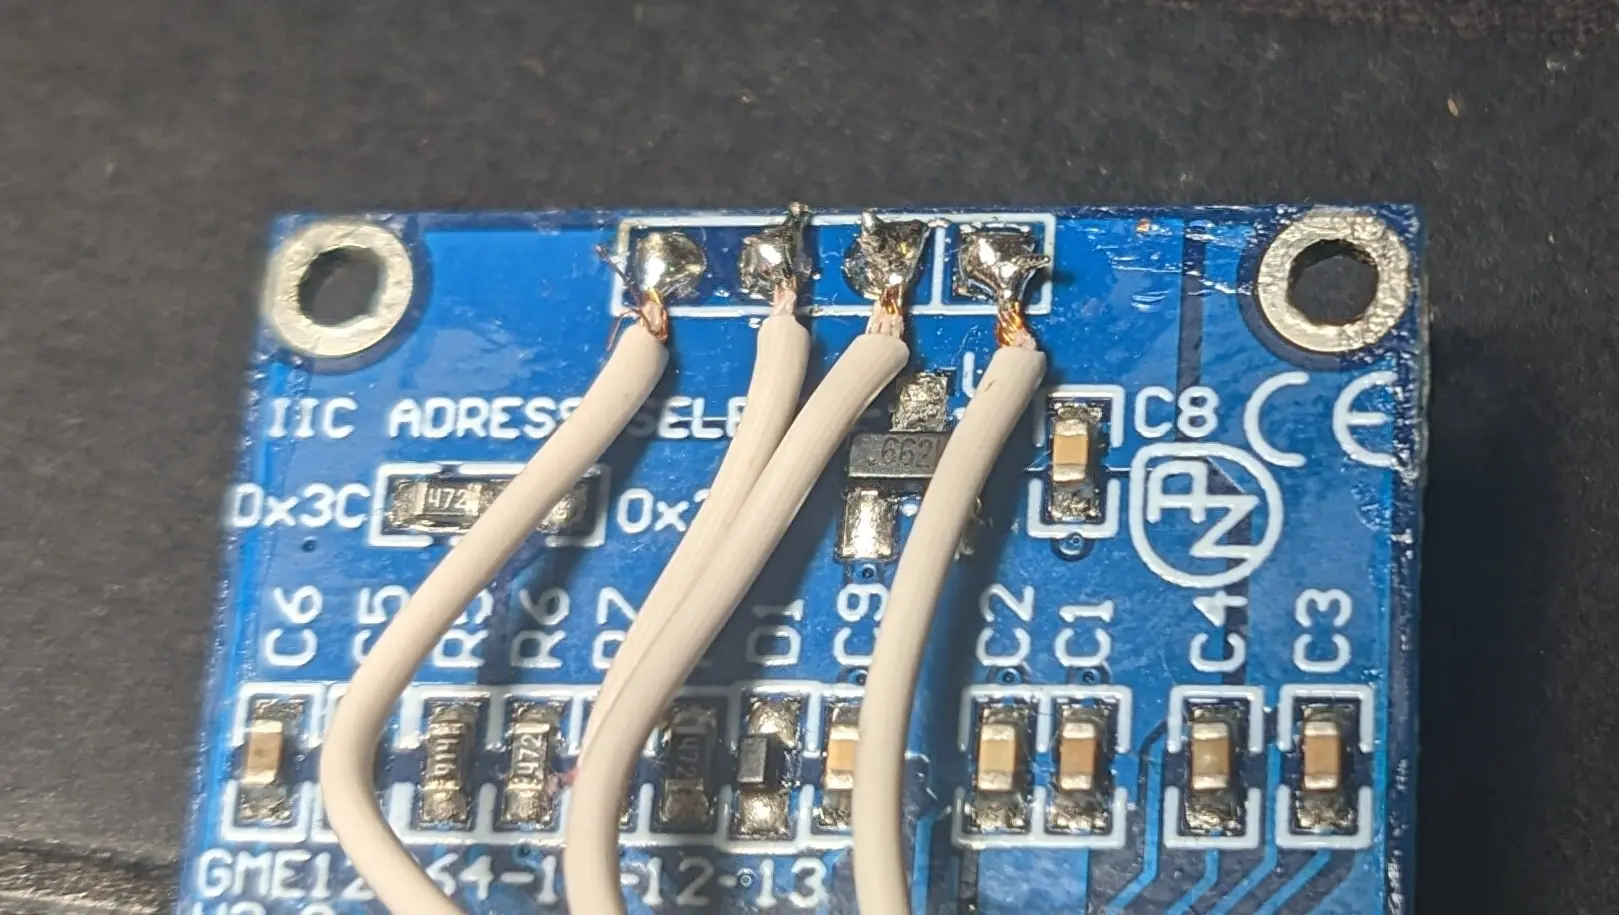
PCB
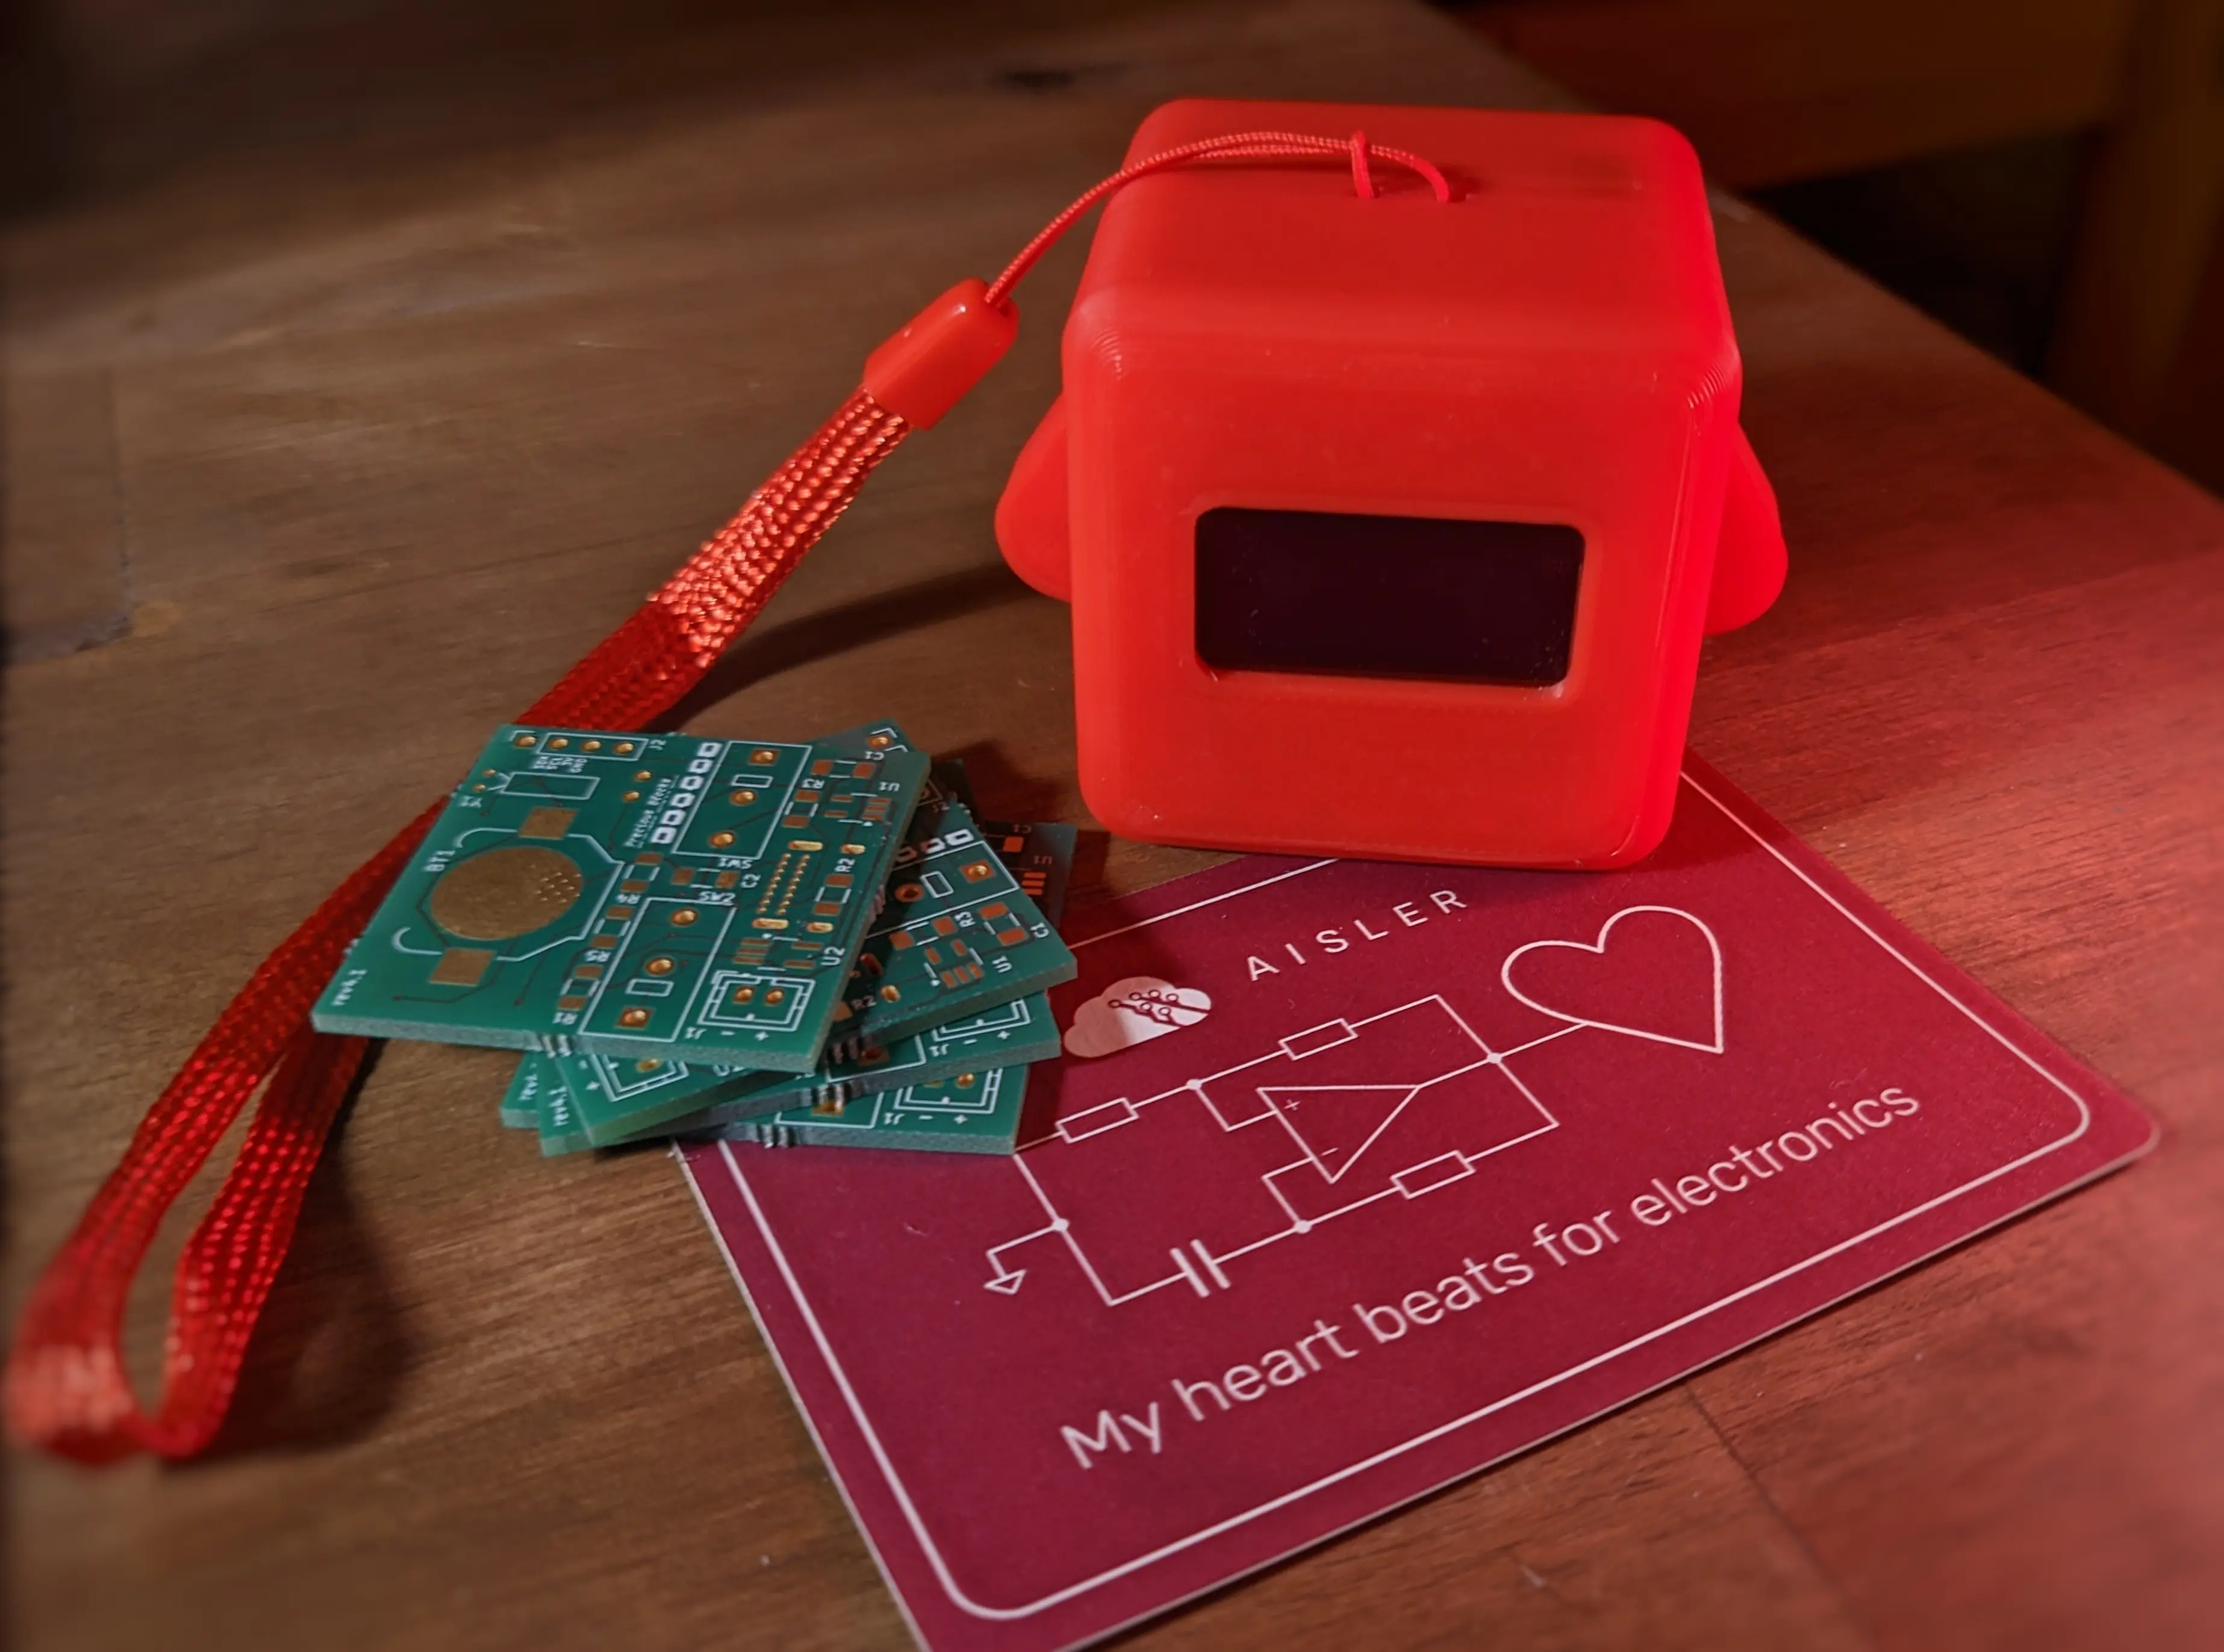
The block is build around a custom-designed PCB, and uses parts that can easily be bought in Europe.
It was designed using KiCAD and you can order it from your preffered PCB manufacturer, by uploading the precious-blocks.kicad_pcb file.
I ordered mine from Aisler and they arrived roughly one week later.
You can use my referral code MakeInEurope-LFKSE for 10€ off you first order.
Parts / BOM
The following parts are required to build the block.
The prices and order-links are as of 26.02.2026, and are intended to be used for reference purposes.
Feel free to source them from different providers or in slightly different variants, as long as they are compatible.
Note
I’m not a fan of buying parts on Amazon, if I don’t have to, but some of the parts are just only easily available over there
| Part | Amount | Order from |
|---|---|---|
| ESP32-S3-WROOM-1U-N16R8 (at least 8MB flash required) | 1 | TME.eu, 6.59€/pc |
| USB4085-GF-A | 1 | TME.eu, 0.83€/pc |
| Microswitch (i.e. D2F-01L) (12.8 x 6.5 x 5.8mm) | 2 | Amazon.de, 0.24€/pc |
| B3U-1000PM button | 2 | TME.eu, 0.86€/pc |
| PCF8523T/1,118 | 1 | TME.eu, 1.04€/pc |
| Keystone 3000 Coin-cell holder | 1 | TME.eu, 0.345€/pc, (min order: 2) |
| CR1220 Coin-cell battery 3V | 1 | TME.eu, 1.56€/pc |
| B2B JST PH-K-S (Battery connector) | 1 | TME.eu, 0.06€/pc |
| STC4054GR | 1 | TME.eu, 1.93€/pc |
| MIC5504-3.3YM5-TR | 1 | TME.eu, 0.162€/pc (min order: 5) |
| 32,768kHz THT oscillator (QT26-32.768KHZF-B) | 1 | TME.eu, 0.61€/pc |
| 0.1uF 1206 SMD capacitor | 2 | TME.eu, 0.46€/pc |
| 1uF 1206 SMD capacitor | 2 | TME.eu, 0.25€/pc |
| 4.7uF 1206 SMD capacitor | 1 | TME.eu, 0.33€/pc |
| 4.7kΩ 1206 SMD resistor | 1 | TME.eu, 0.1€/pc |
| 10kΩ 1206 SMD resistor | 5 | TME.eu, 0.077€/pc |
| 5.1kΩ 1206 SMD resistor | 2 | TME.eu, 0.12€/pc |
| 1027 Mini Vibration Motor (10mm x 2.7mm) | 1 | Amazon.de, 0.38€/pc (min order: 20) |
| SSD1306 0.96“ I2C OLED | 1 | Amazon.de, 7.80€/pc |
| 3.7V Li-Ion Battery (maximum dimensions: ~30x30mm), recommended 400+ mAh, with JST connector | 1 | Amazon.de, 9.6€/pc |
| 2.4GHz FPC Antenna (U.FL / MHF I / AMC connector) | 1 | SeeedStudio, 1€/pc |
Case
Besides all electronic parts, you also have to source the case parts.
The case was designed using FreeCAD, and you can use the project file to export the required models. For your convenience, they have also been included in the repository:
You can print the parts as shown in the photo with 15% infill and without support or brim.
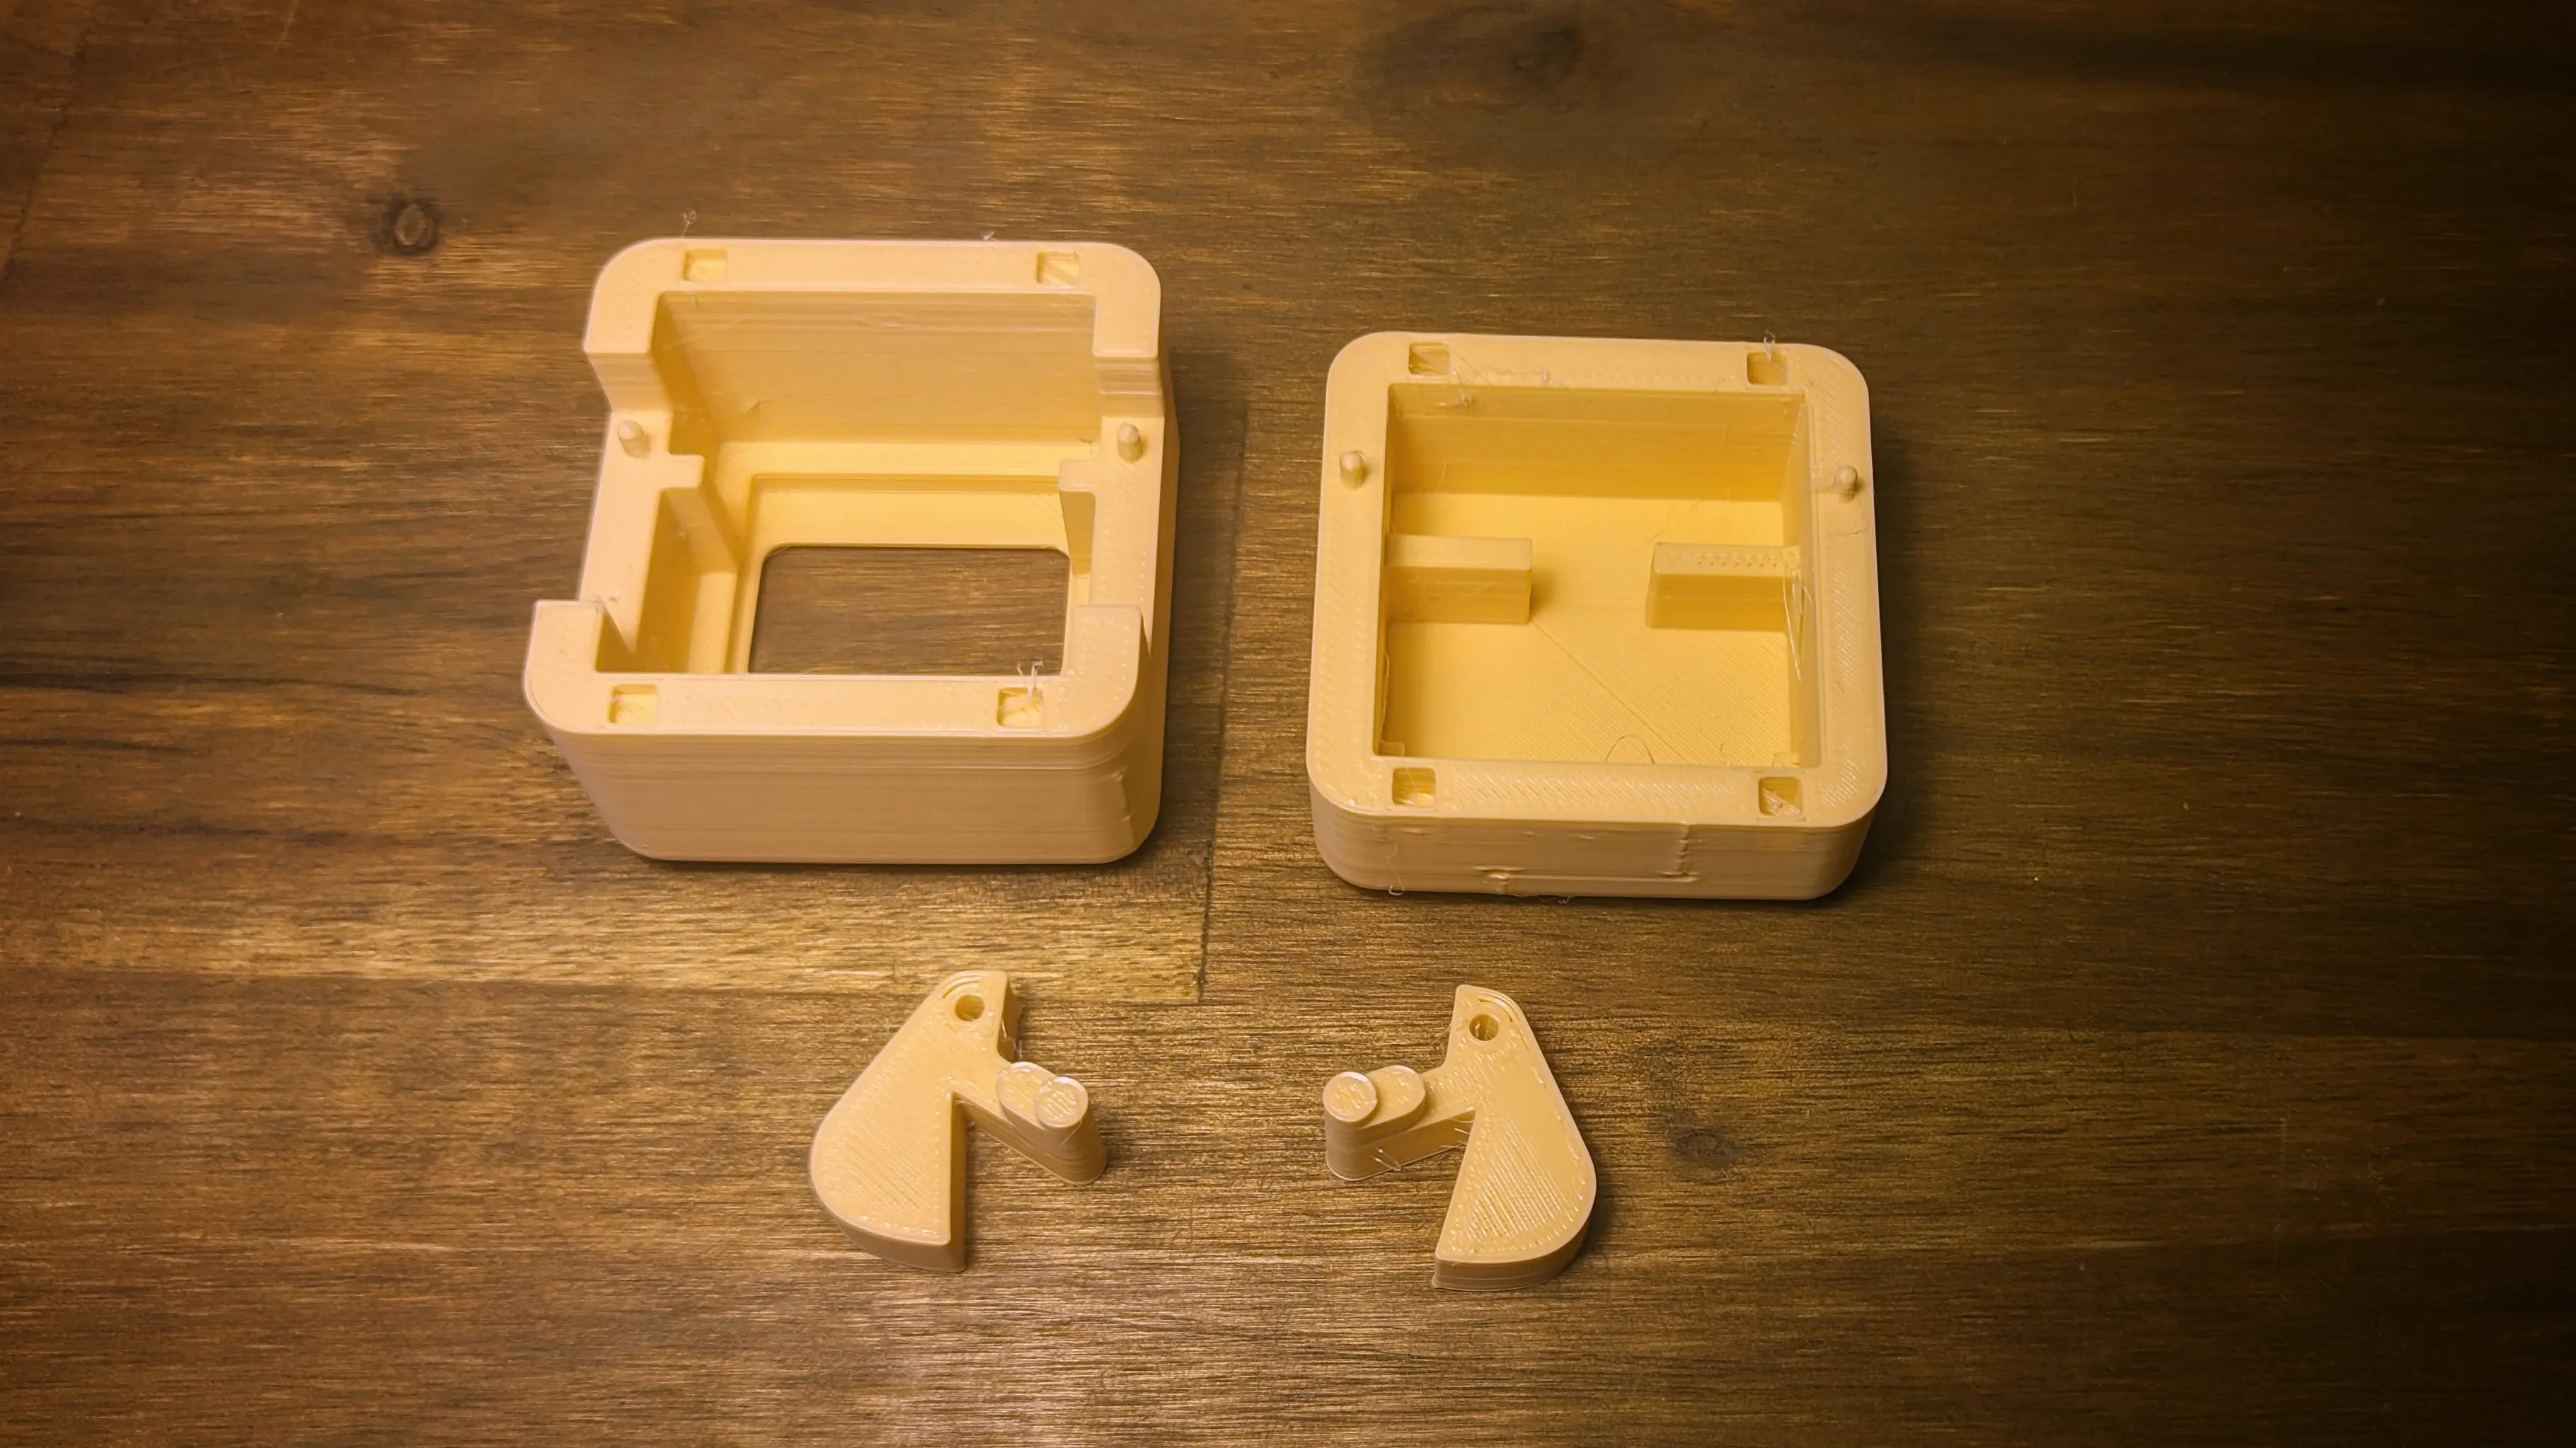
To be able to assemble the case you will also need some magnet cubes, which are used to snap the case shut.
You can also optionally buy a carrying strap (I personally love it, especially to fidget).
Note
I’m not a fan of buying parts on Amazon, if I don’t have to, but some of the parts are just only easily available over there
| Part | Amount | Order from |
|---|---|---|
| 3x3x3mm cube magnet | 8 | magnethandel.de, 0.18€/pc |
| Carrying Strap | 1 | Amazon.de, 3.9€/pc |
If you are looking for filament to order, you can order the Samples from Das Filament (Germany).
The samples are enough to print at least one Precious Block.
You could even buy multiple and print all parts in different colors.
Assembly
Once you received all parts, you can start assembling the block.
Important
The steps and component names are based on the
rev4.1board. If you have a different one, make sure to check the schematic.
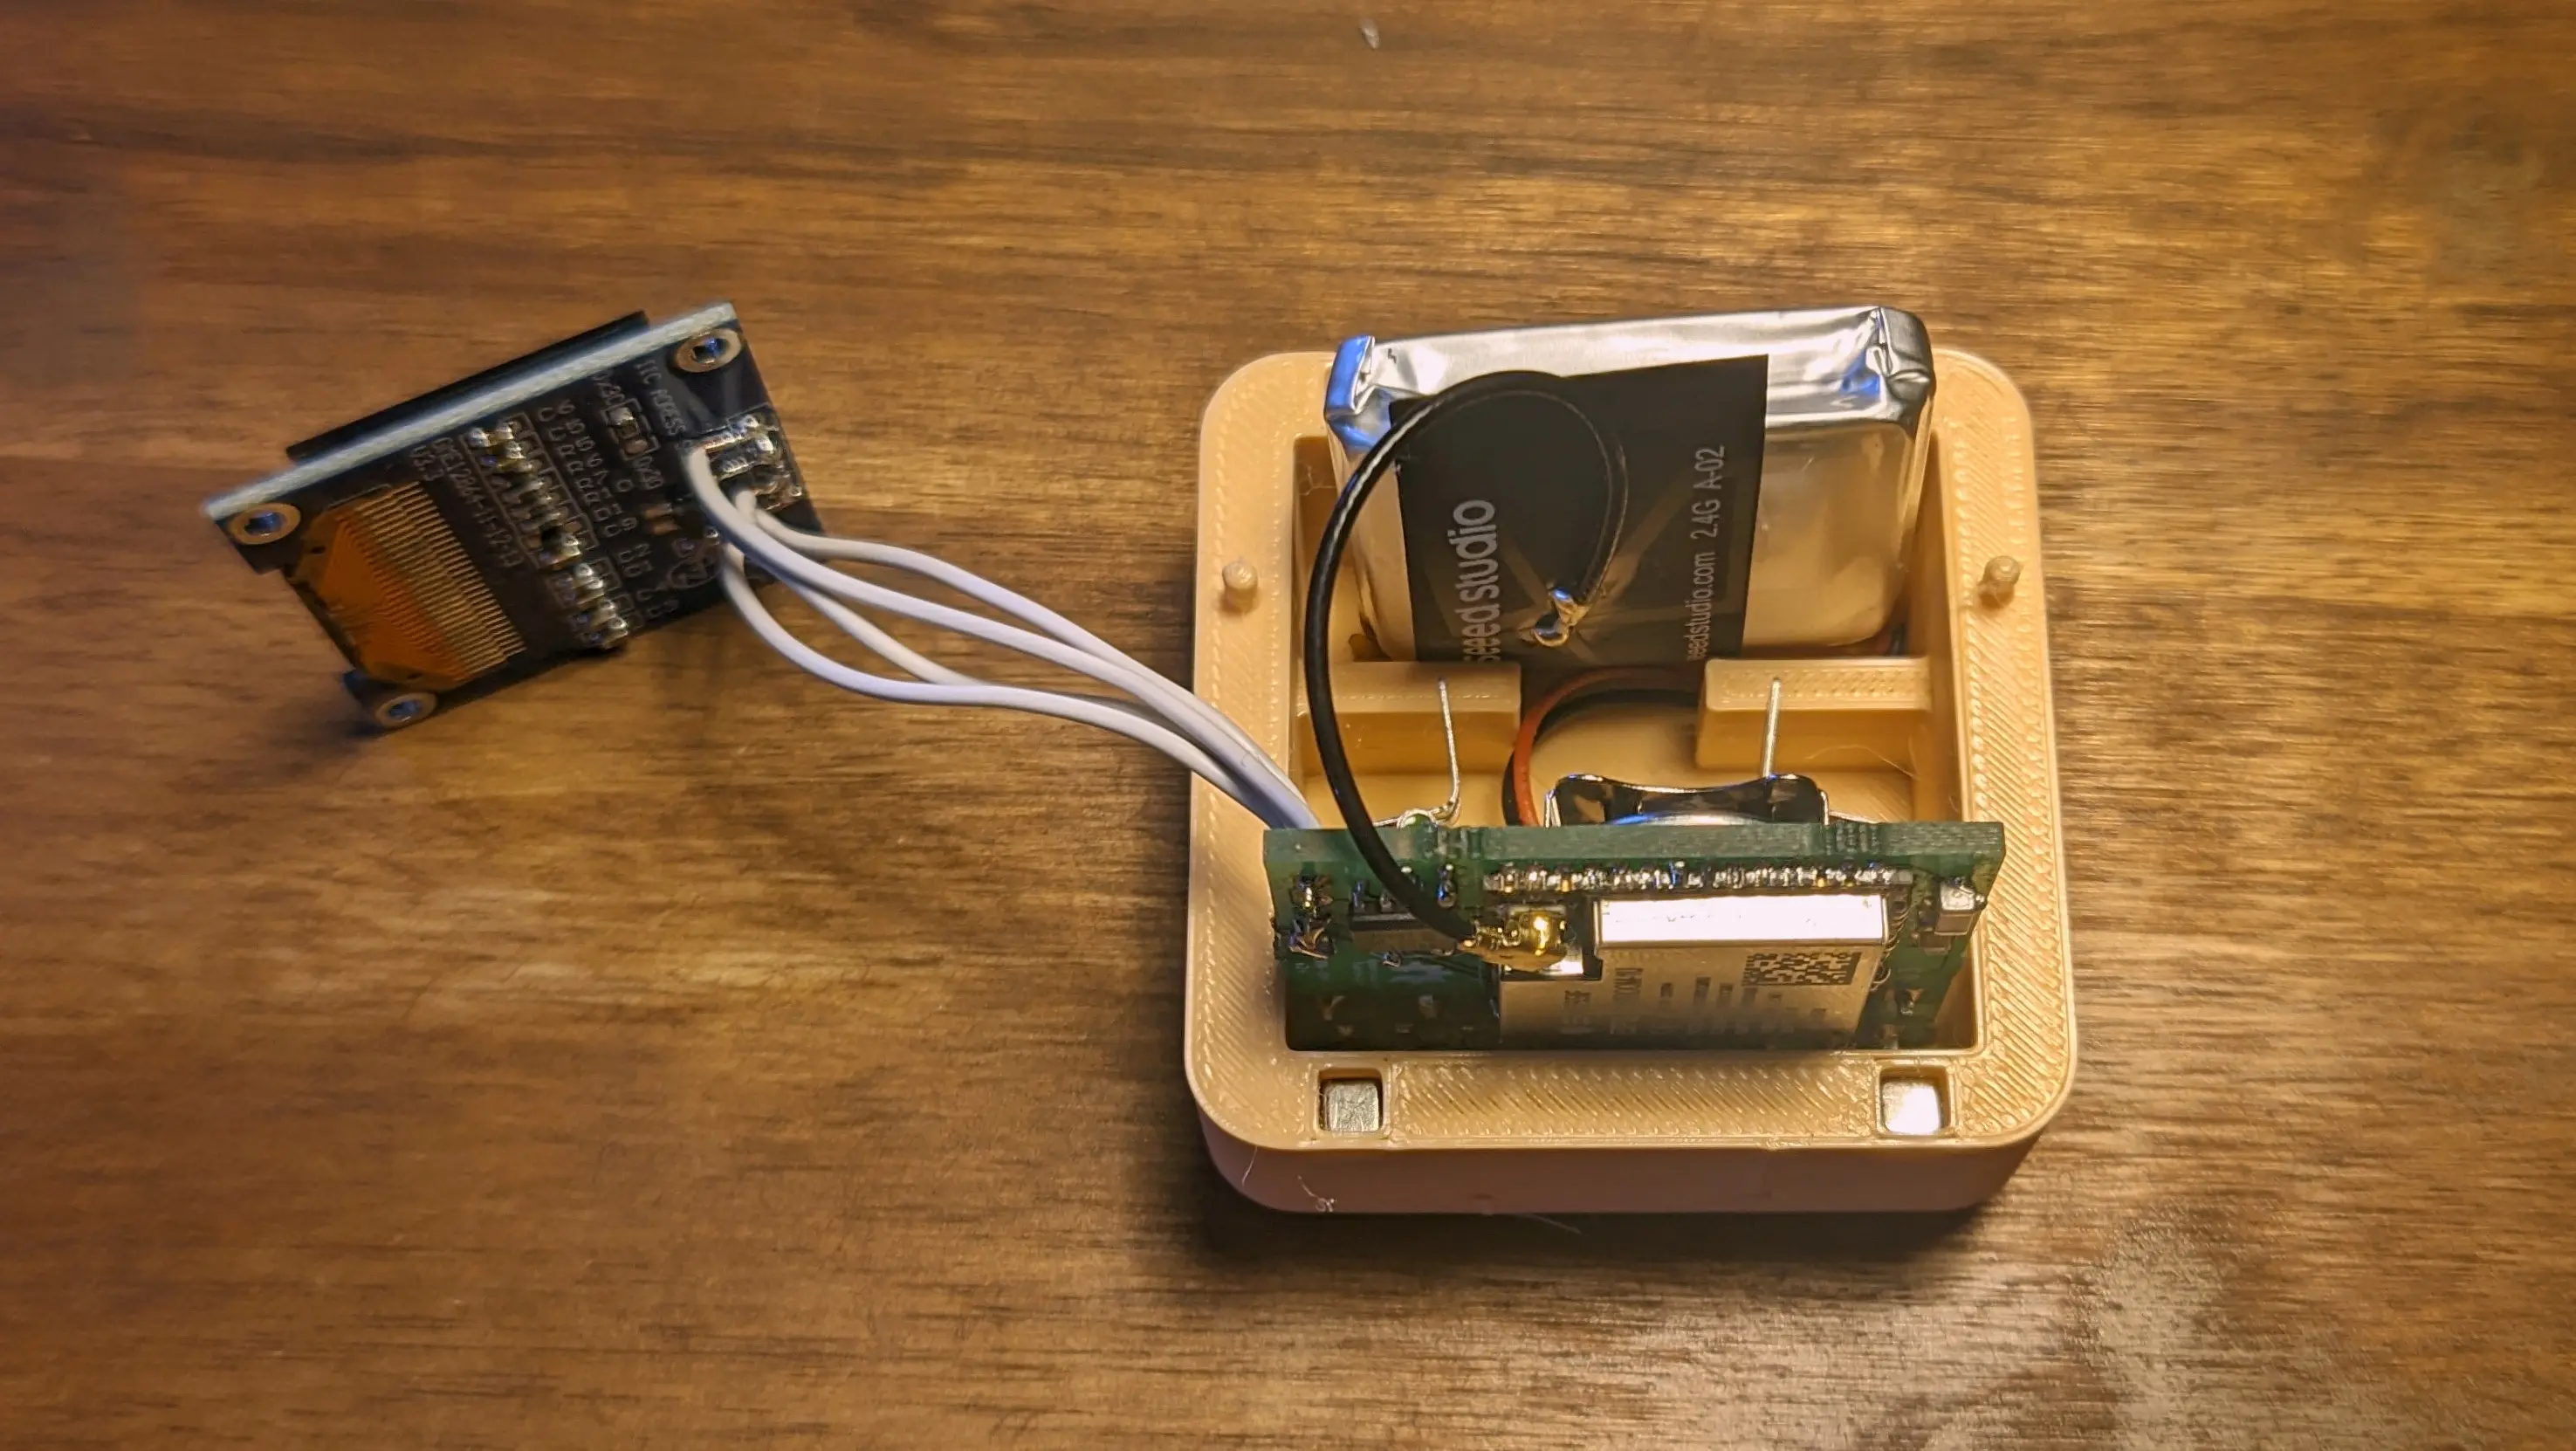
PCB
Besides the components, you will also need a soldering iron, solder, and additional tools like tweezers.
Many of the components are surface mounted (SMD), feel free to use heat reflow or other methods, but I found that using a fine soldering iron tip works fine as well.
You can use the Schematic (PDF) as a reference for components.
Tip
You can follow the assembly order listed below, to validate the components as you go along
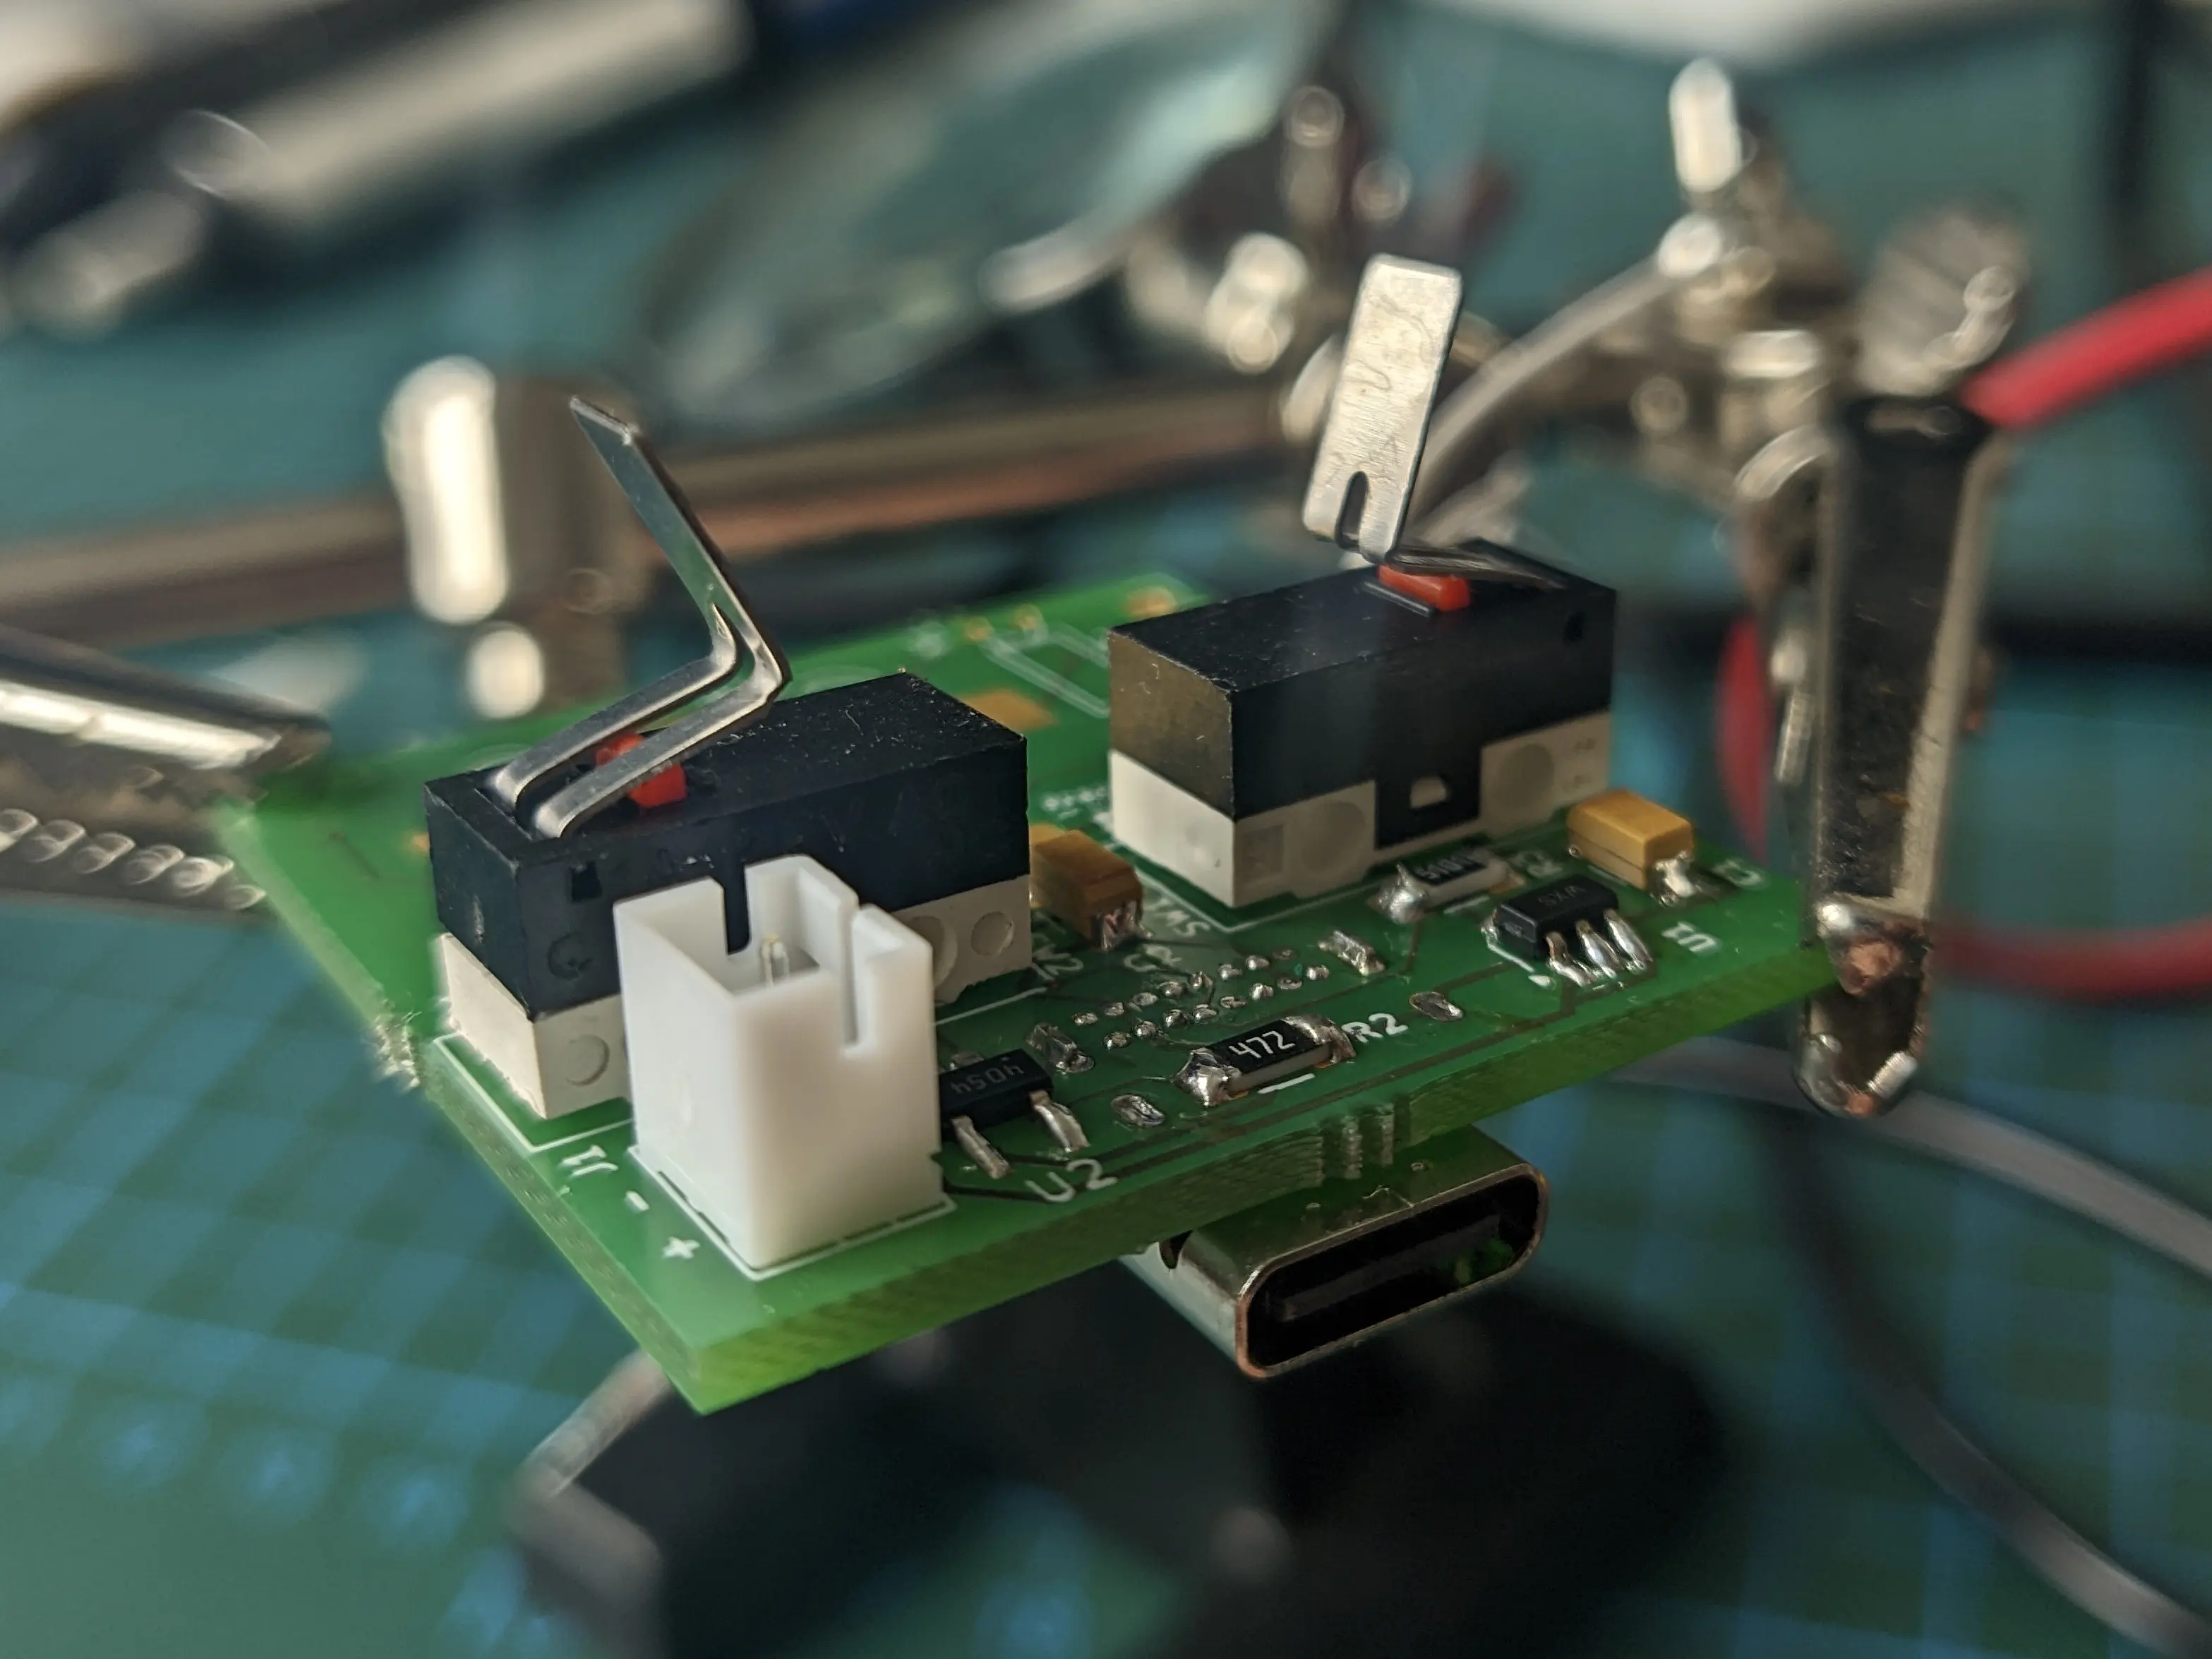
Main Controller
We’ll start by soldering on the ESP32S3 WROOM (U3).
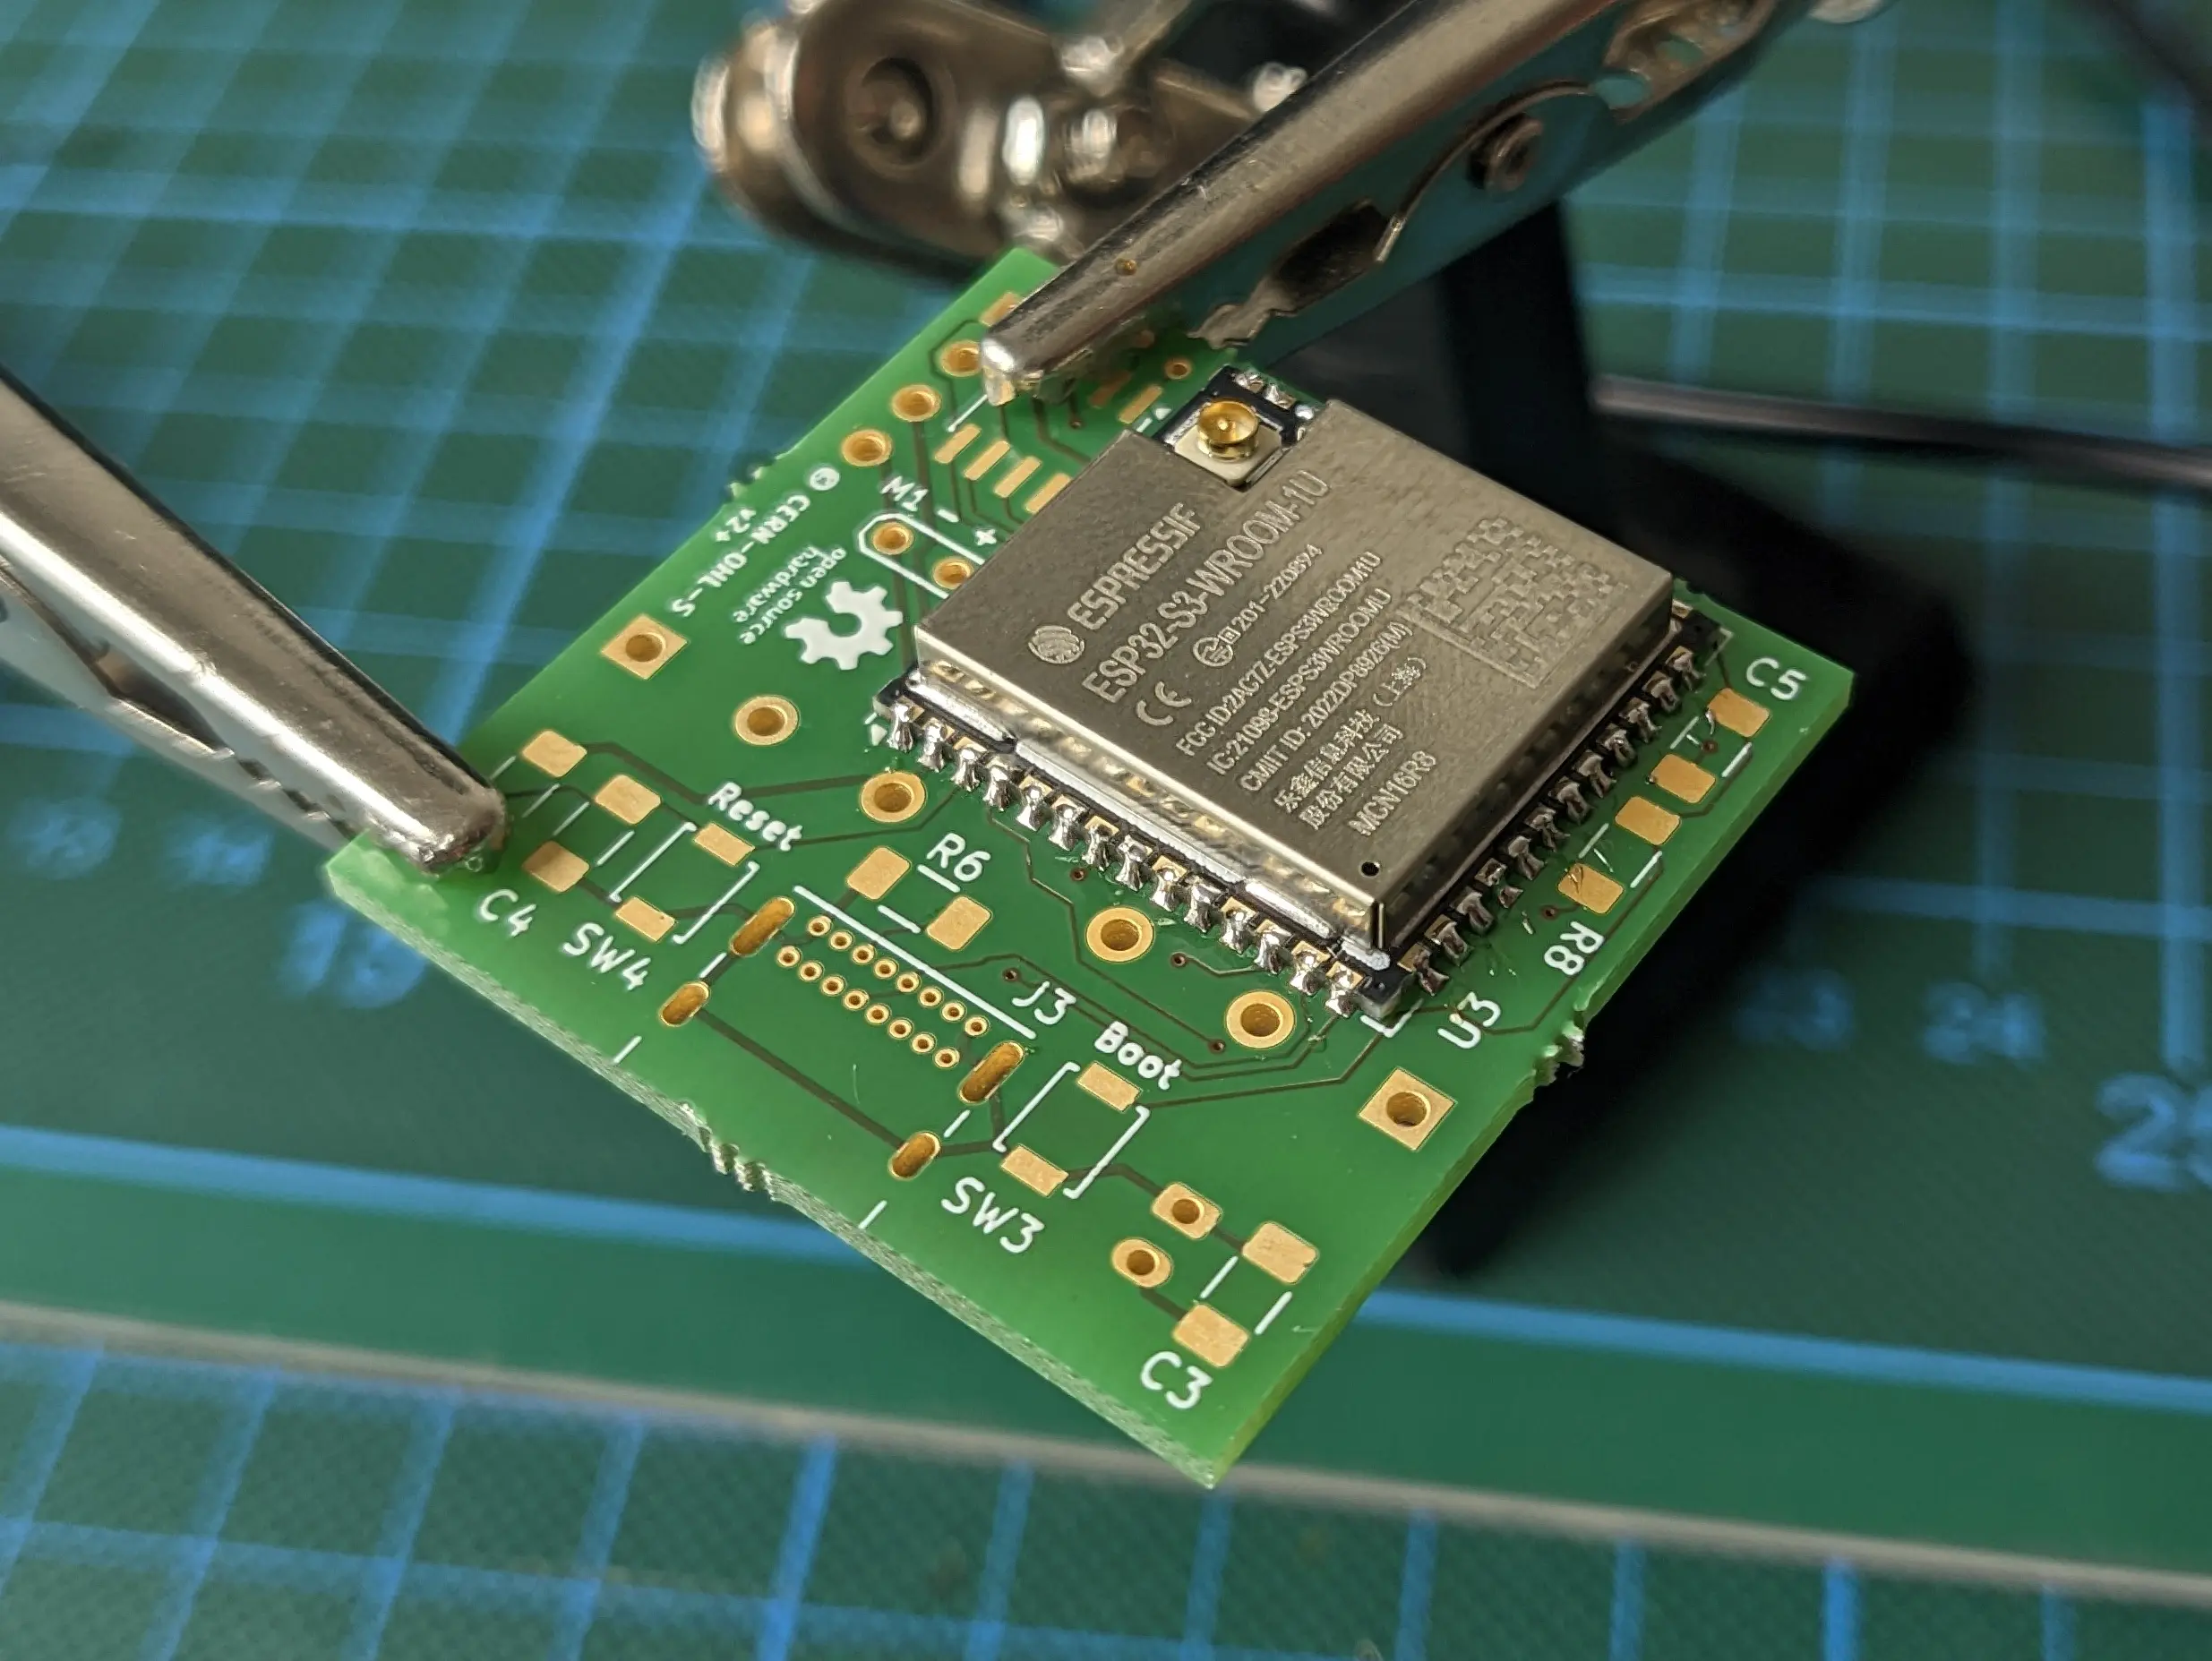
Afterwards, we’ll add the USB408 USB-C port (J3) and both the boot and reset button assembly (SW3, SW4, C4, C5, R7, R8).
Tip
If you want to ensure the ESP is functioning properly, you can hook up the 3V3 and GND lane, which is exposed through the display interface to an external powersupply and connect a USB cable between your computer and the device. You should see that the device is showing up in
lsusbas an Espressif device Which you can control using the Boot and Reset buttons.
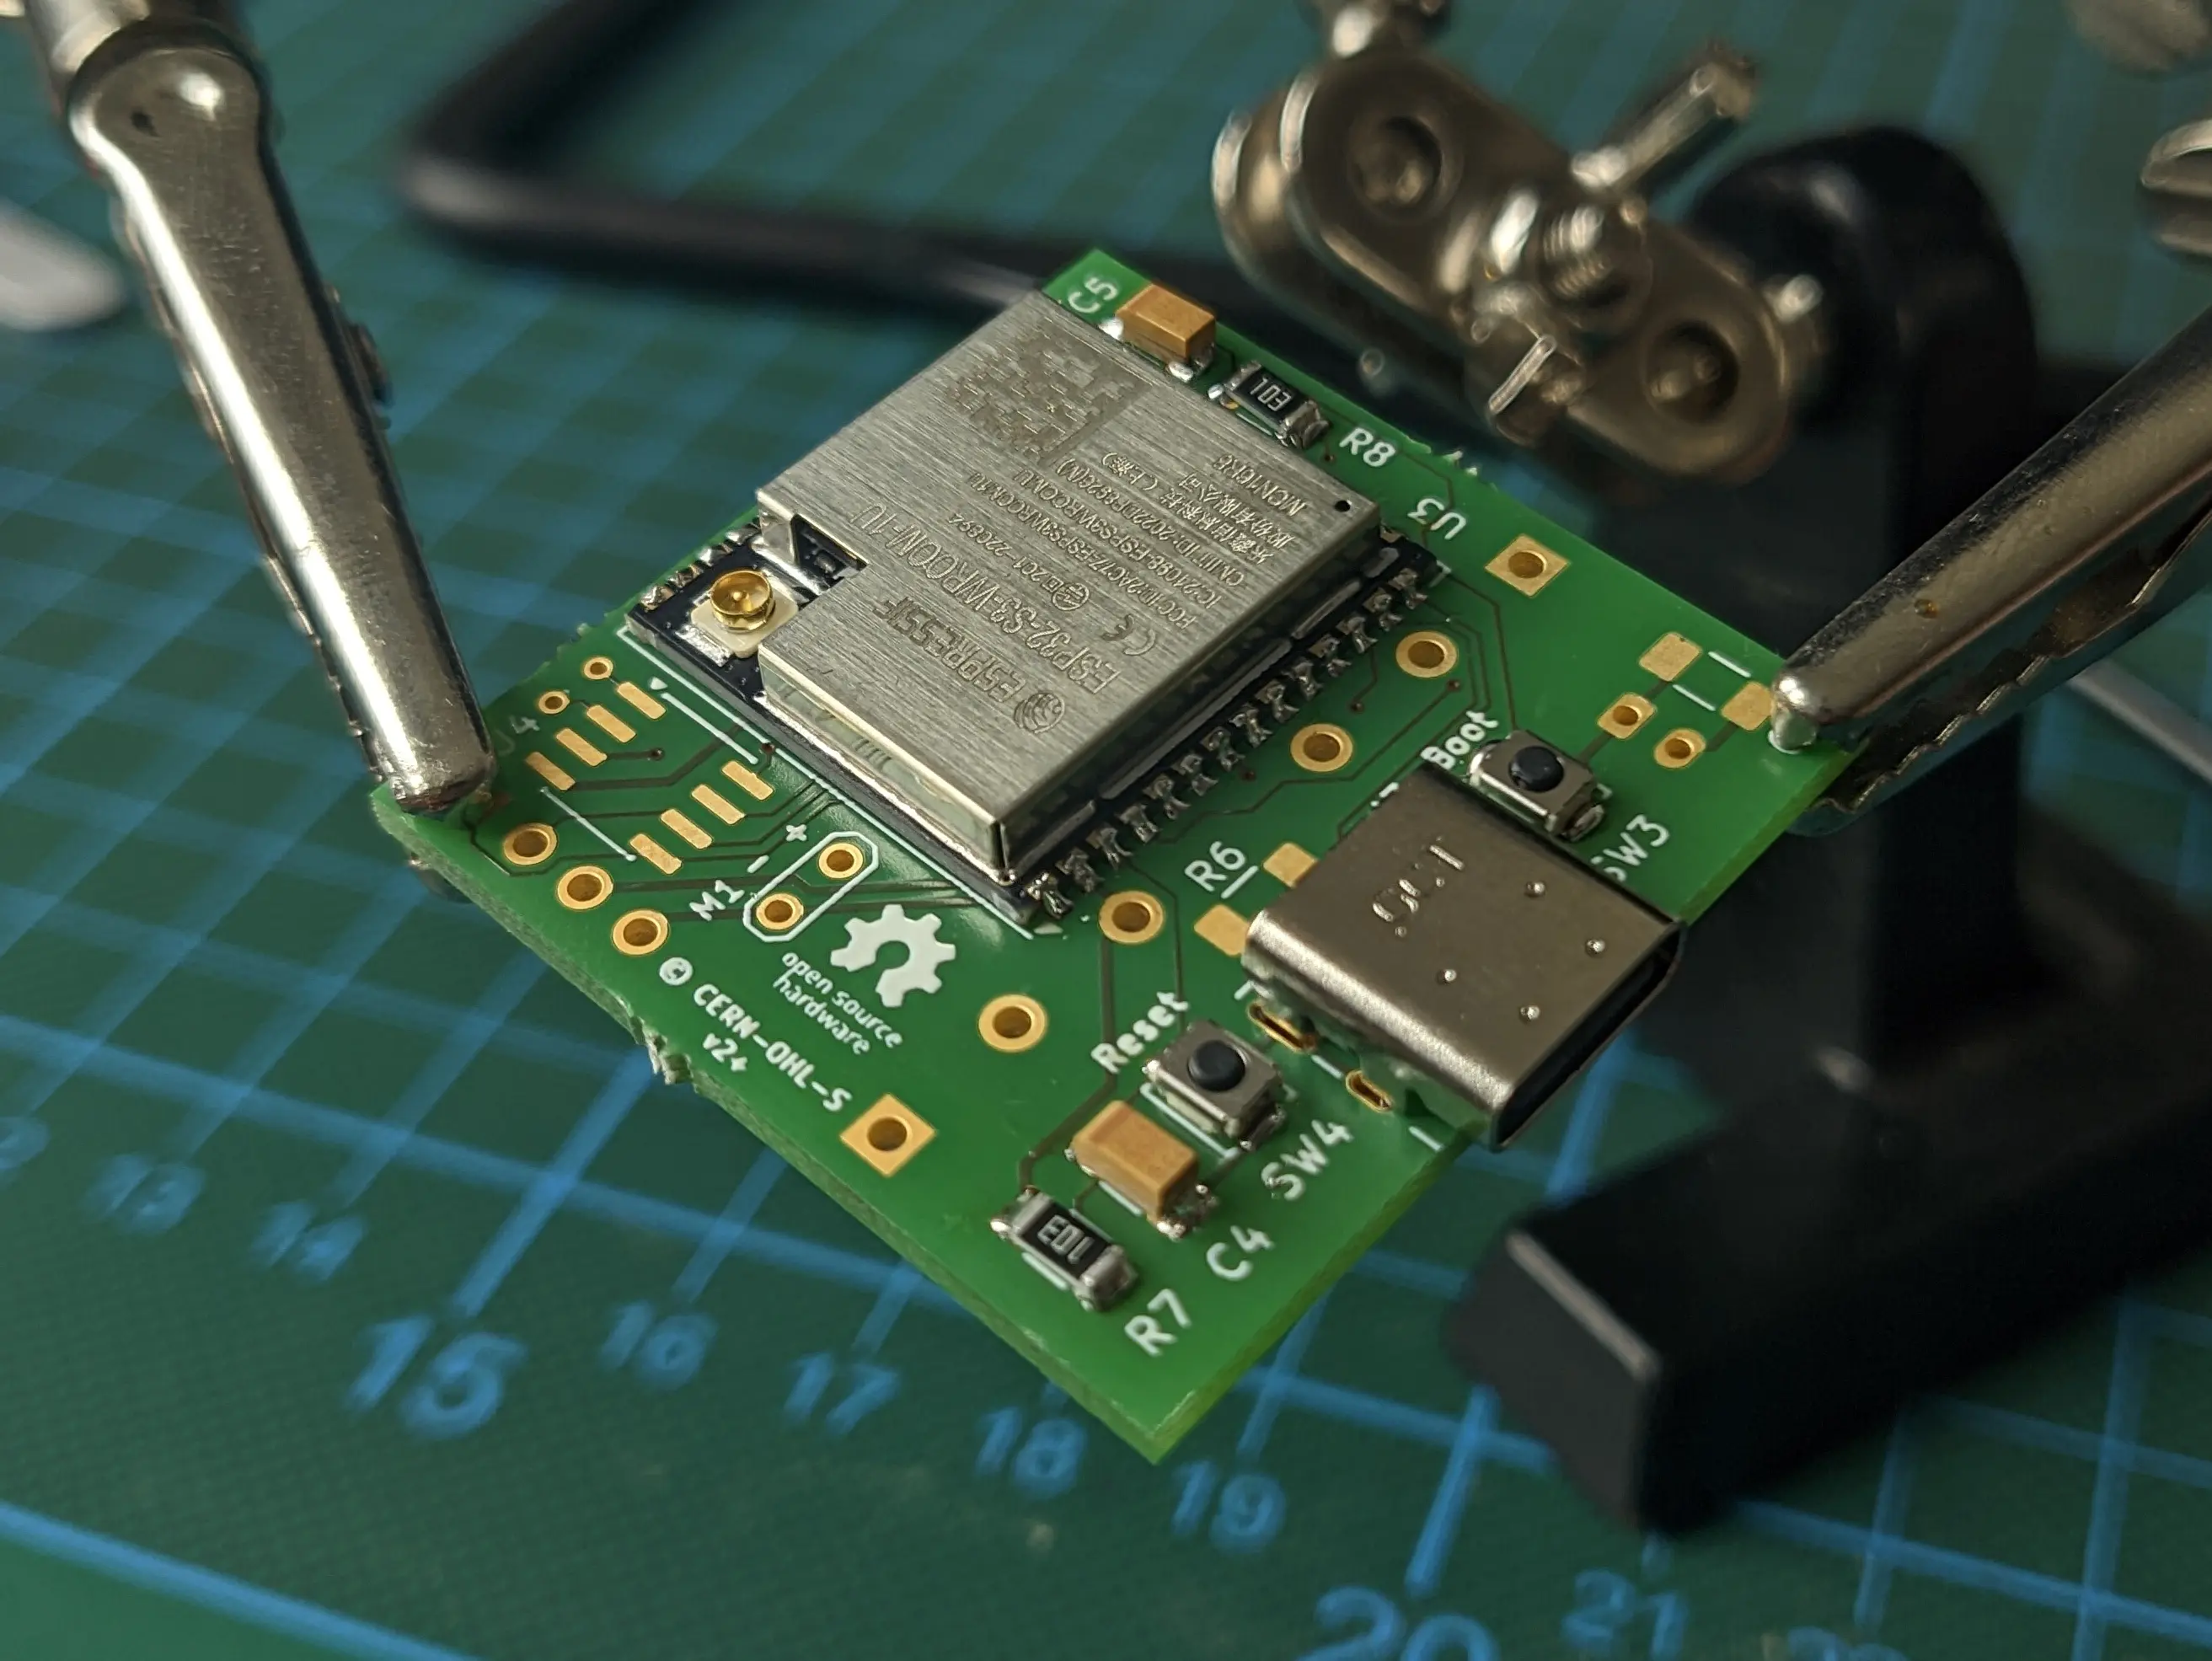
Power Management
With the ESP, being the most complicated part, out of the way, we can move on to the on-board power-management.
This includes the voltage converter MIC5504 (U1), battery charge controller STC4054GR (U2), battery controller port JST PH-K (J1) and R2, C2, R3, R6, C1, C2, C3,.
Tip
To confirm if everything is working as expected you can connect the battery to the battery connector and plug the device back into your computer. It should show up the same way it did before, but without requiring an external power source.
Required Peripherals
With the base system done, we can move on to the required peripherals.
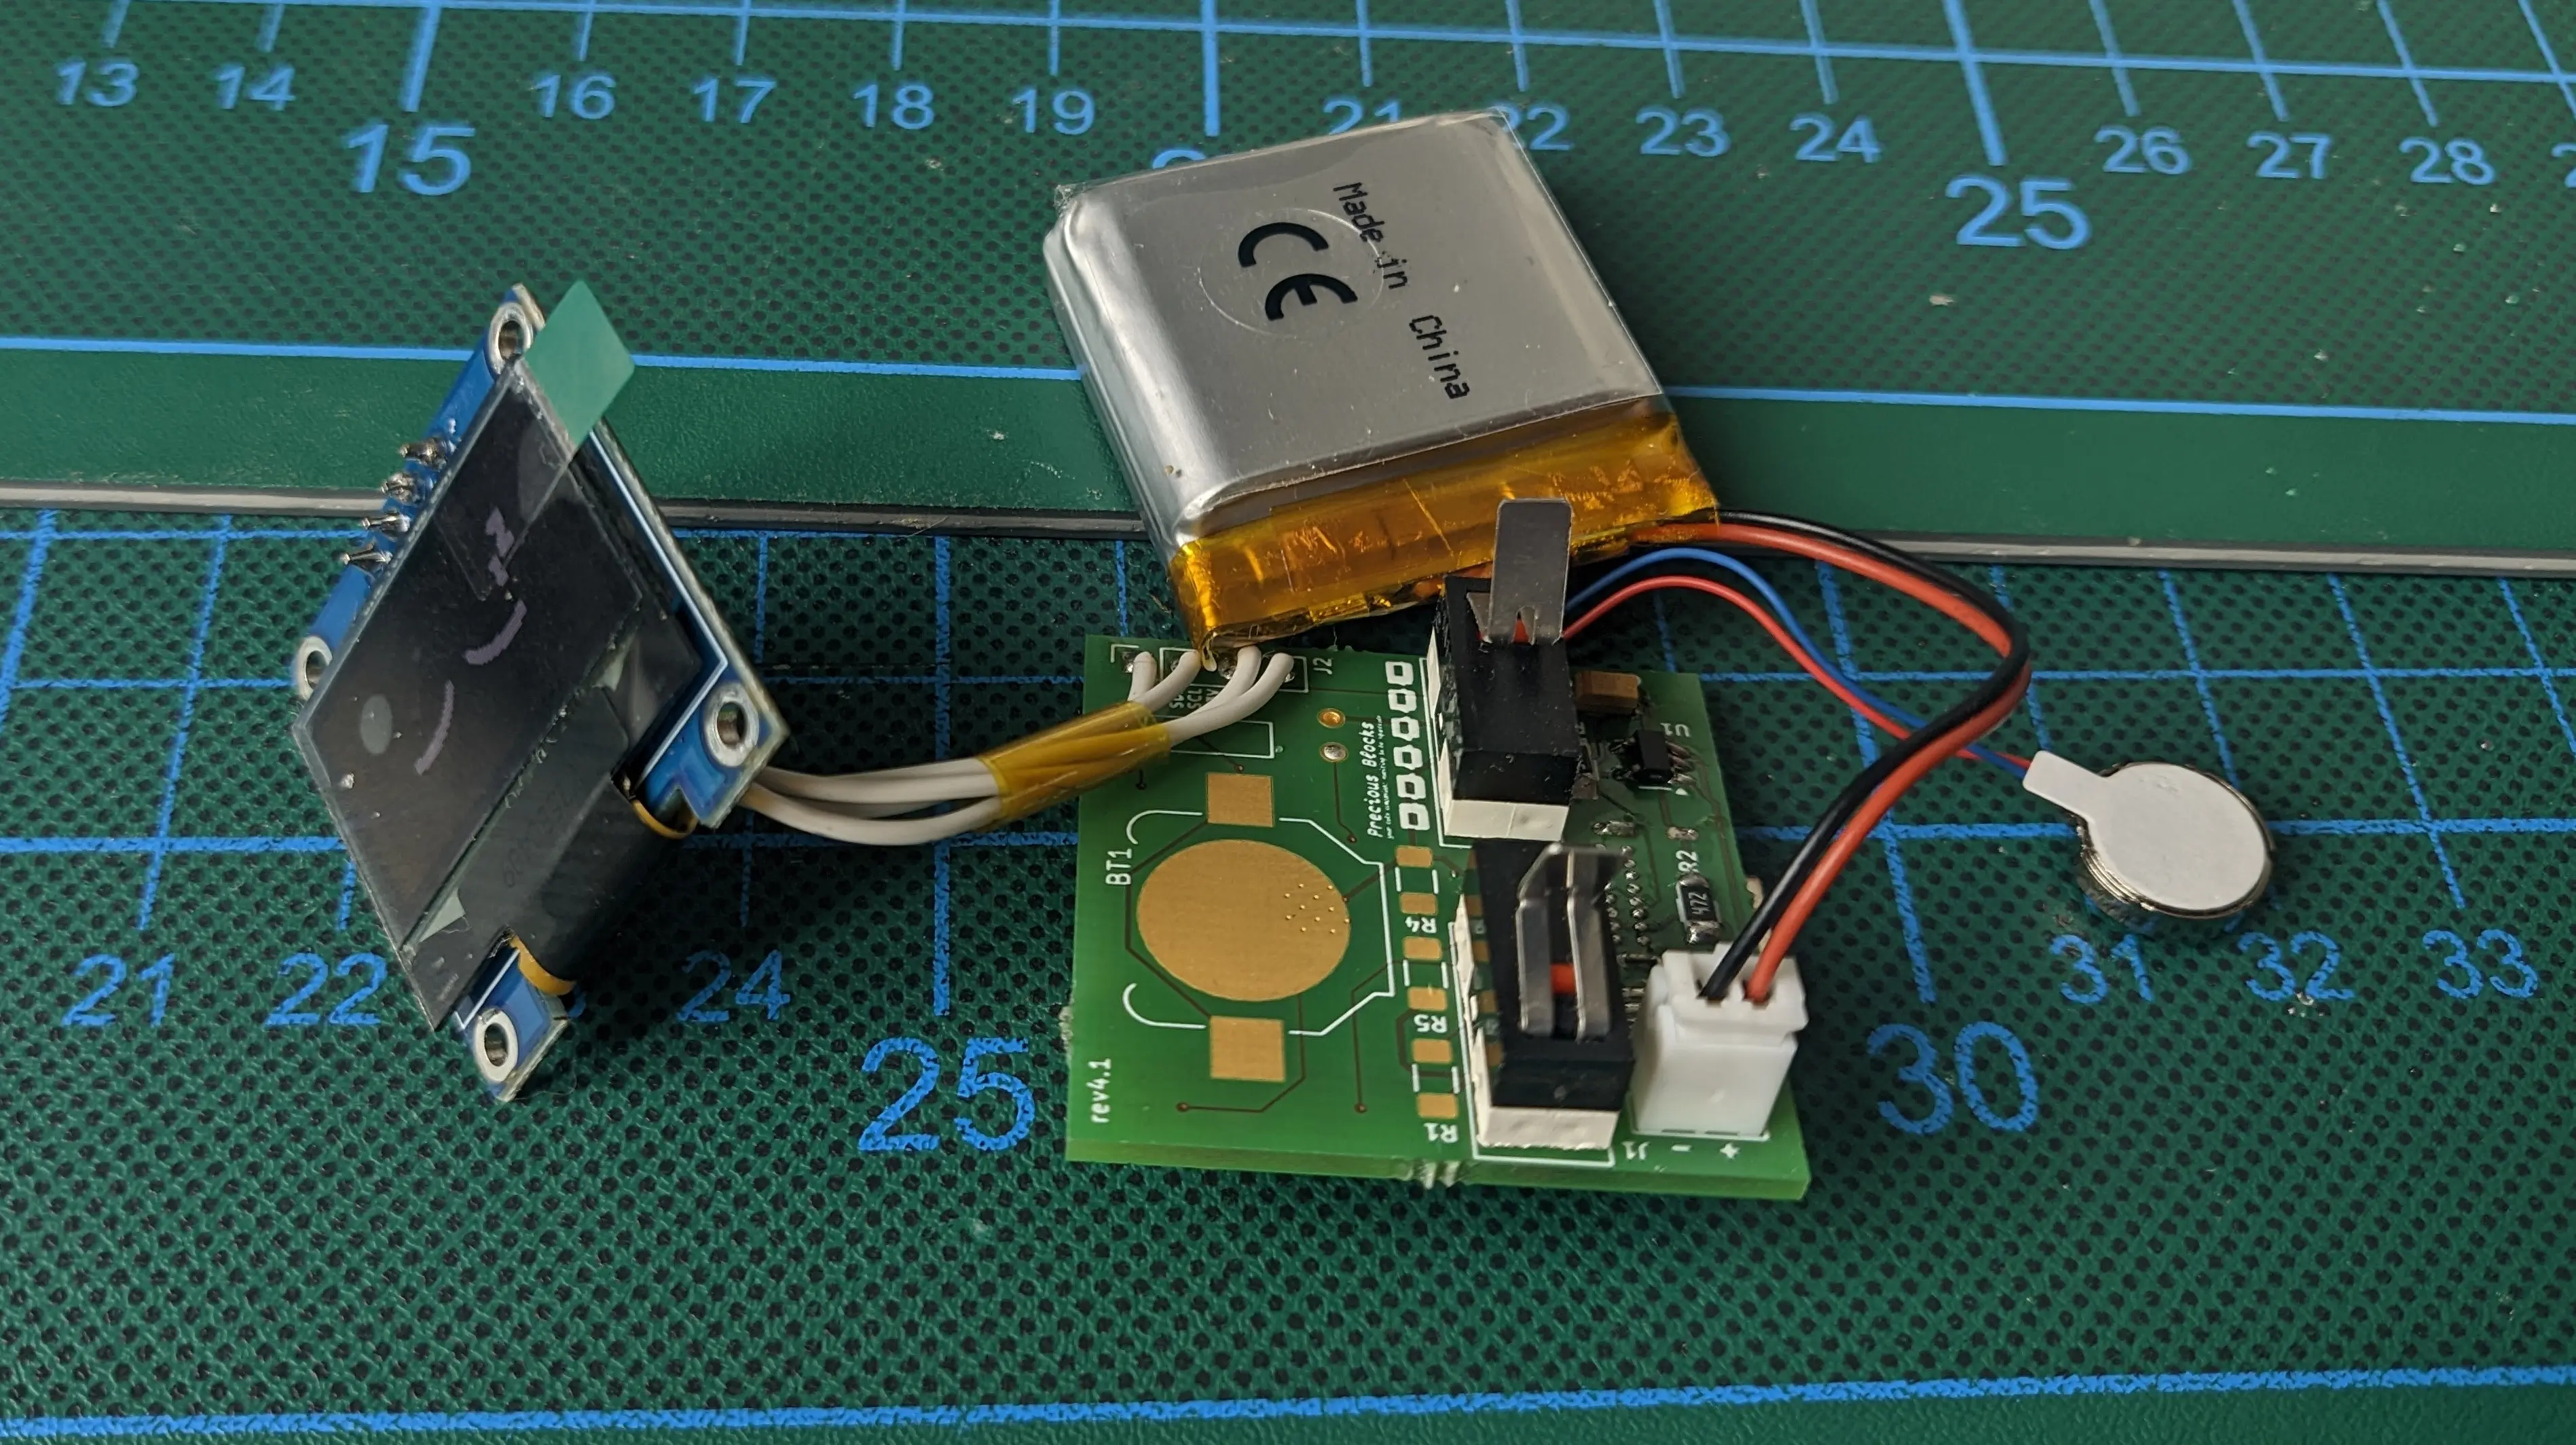
Before hooking up the display, I would recommend unsoldering the display pin header, to make more space in the upper part of the case, where the battery will be stored.
After unsoldering it, solder on four wires (roughly 4cm long) and hook them up to the top of the PCB (J2).
Tip
If you are impatient, you can already test the display by flashing the firmware onto the device and powering it up / resetting the device (See below)
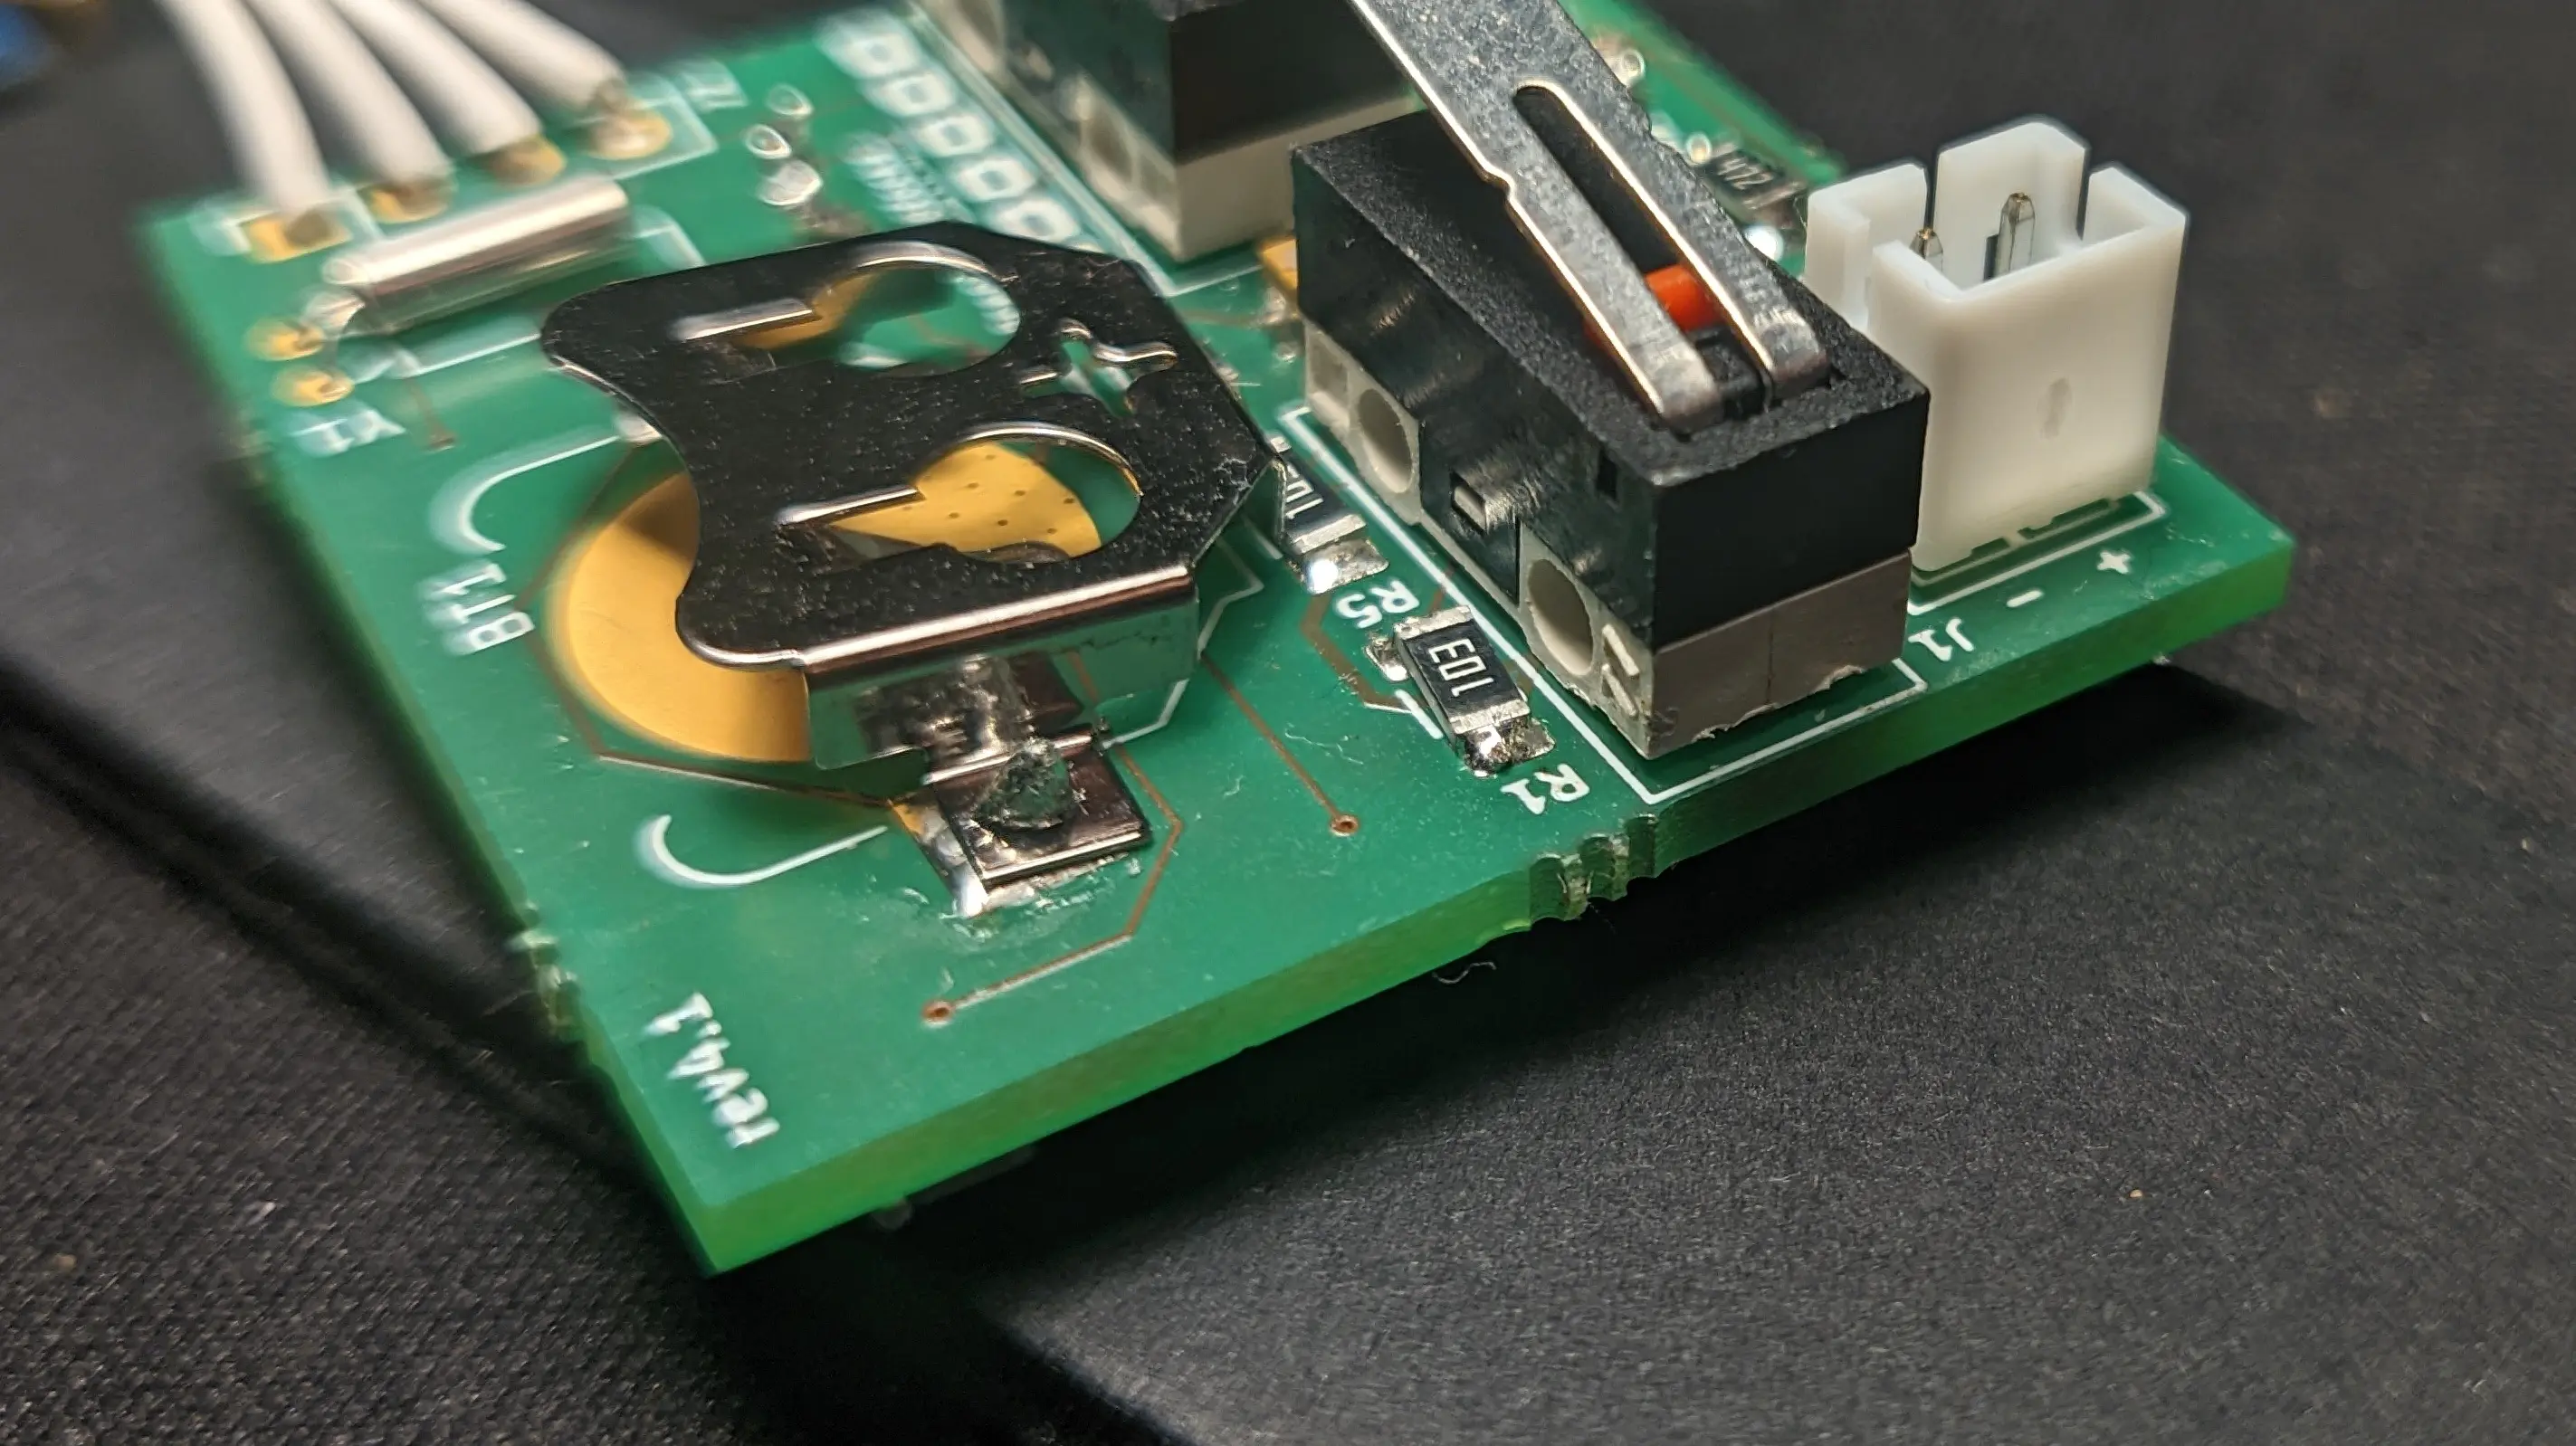
You will also want to solder on both limit switches (SW1, SW2), as they are required to turn on the block.
Make sure to bend the metal plate on the switches about 90 degree at the midpoint, to give the arms something to interface with.
Feel free to experiment with different angles for different button push-back force.
Tip
If you’ve already flashed the firmware, you should now be able to wake the block from sleep
Additionally, you should hook up the vibration motor to the pins on the bottom.
Tip
When you wake the block, by pressing both arms the motor should vibrate indicating that it is working properly
Flashing the firmware
You should now be able to flash the firmware onto the PCB in download mode.
Note that you have to hold the Boot button, while pressing the Reset button to enter the download mode, when a battery is connected.
If you flash the block for the first time, espflash might complain that the block is stuck in download mode and it is waiting for a response.
In this situation, check if the firmware flash process was successful,
and manually reset the block.
This should not be required from now on.
Once you restart the block, you should see the sleeping eyes shown on the display and be able to interact with it using the arms.
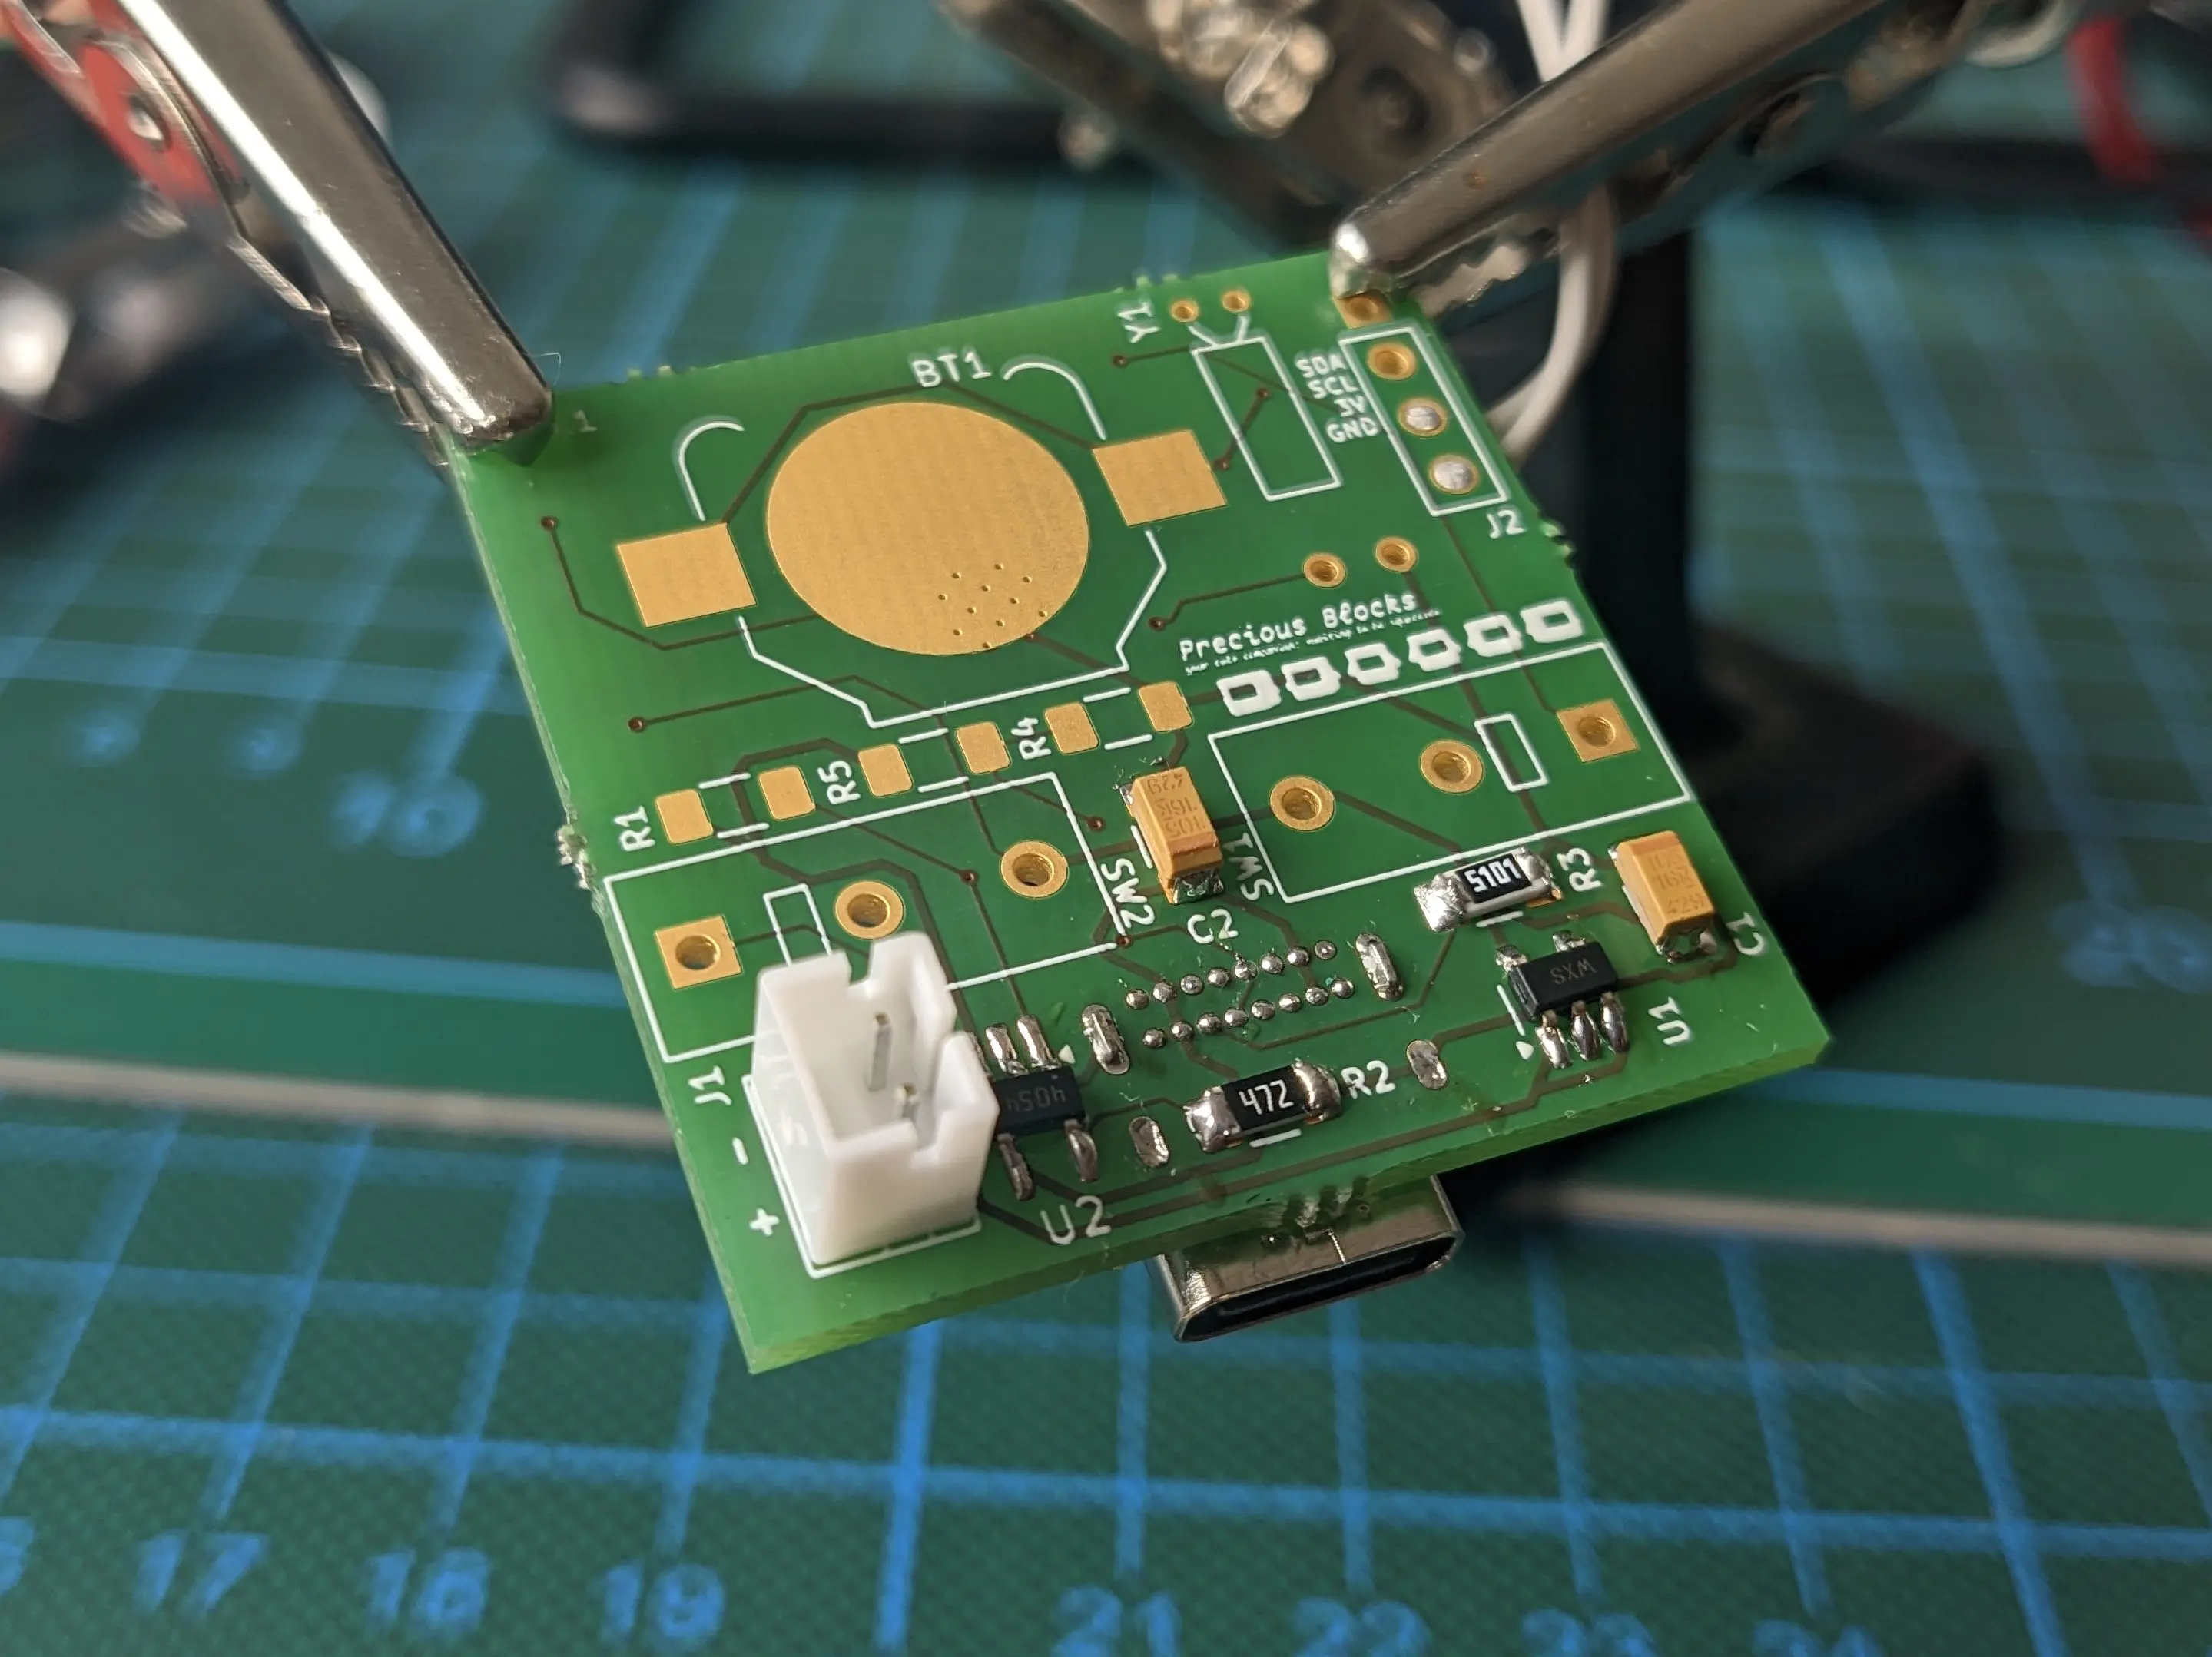
Additional Peripherals (recommended)
Finally, you can solder on the external clock module,
by soldering on the PCF8523T (U4), the oscillator (Y1), and the coin cell battery holder (BT1).
You also have to add a coin cell battery (CR1220) as the device won’t turn on otherwise.
You should also solder up the resistors required for battery charge monitoring (R1, R4, R5).
Important
Furthermore, you should hook up an external wifi antenna to the ESP antenna port if you want to use WiFi.
And make sure the Li-Ion battery is connected.This should leave you with a fully working PCB, ready to be mounted inside the case
Case
Both the front and back have recesses to fit four magnets.
The magnets are used to align the two shell pieces and ensure they stay together.
You can use instant glue to glue the cubes into the front of the case.
Afterwards match the magnet orientation for the back, so the front attracts the back.
And glue them in place by pushing them into the recess on the back using a wooden rod (or a different non-magnetic rod).
Tip
You should do a test fit after the glue dried to make sure you got the orientations correct (trust me).
If one of the magnets is wrong, use a pair of parallel pliers (or comparable) to remove it from the front part by wiggling it.
With the magnets in place, you can glue the vibration motor into the recess in the bottom of the back case.
You can also reconnect the battery (if you removed it) and use some sticky-foam-tape to glue it into the box on the top.
Afterwards, slide in the pcb into the back of the case, making sure to align the USB port on the back.
Tip
You can stick the WiFi antenna to the LiPo using electrical tape, it should perfectly fit into the top, although you might have to bend the cable a little to allow the front to go on properly
To install the display, push one side into the recess and slowly press down on the opposite side to snap it in place.


Tip
You can remove the display by applying even pressure (i.e. using your thumb) to it from the front of the case. Make sure not to overdo it though, as you might crack the fragile display components.
Before sliding on the front, push the arms onto the pins on the back,
making sure the arms interface with the limit switches on the PCB.
Now, push on the front case and make sure the PCB fits into the PCB mount in the front half.
Lastly, you can push the lanyard wire through the hole on the top and fix it in place by looping it through itself.
Note
That is it - you have fully assembled your own Precious Block
Enjoy 🌸
Overview
This chapter will guide you through some key Precious Blocks firmware-development steps.
It is meant for people who want to contribute new features to the blocks
or adapt them to their use case.
The device firmware can be found in the firmware repository on Codeberg
and is licensed under GPL-3.0-or-later.
More detailed license information is tracked using the REUSE spec in the REUSE.toml, and other nested REUSE.toml files.
Notes on custom firmware
This chapter only focuses on the official Precious Blocks firmware.
If you want, you can simply flash your own custom firmware onto the internal microcontroller over USB, like you would with other ESP-based projects.
Simply select a binary firmware built for the ESP32-S3 (make sure to match the flash and psram configuration) and flash it using esptool.py or espflash.
The internal PCB also exposes the boot and reset buttons, which you can use to control the boot mode behaviour.
Dev Environment
Start off by downloading the firmware source code from Codeberg.
git clone "https://codeberg.org/precious-blocks/firmware"
Precious Blocks are built around the ESP32S3 microcontroller,
which uses an Xtensia architecture.
Because the architecture is not supported by upstream Rust (and LLVM),
we have to use the downstream Espressif forks.
If you plan on setting up the build system on your host device,
you can follow the esp32-rs book.
The firmware repo also contains a Dockerfile, which allows you to easily build the project inside a container.
You can use the provided docker/quickaccess file to build the docker container and create aliases, which allow you to cargo, clippy and espflash commands.
source docker/quickaccess
# simply use cargo and espflash as you normally would
# the commands will execute in the container
Once you have set up everything, you can simply use cargo run --release to build and flash the binary to the chip.
Note that you have to wake up the block before being able to flash it, because the serial interface is not available in deep sleep mode.