Components
To be able to build your own block, you have to source all required parts.
PCB
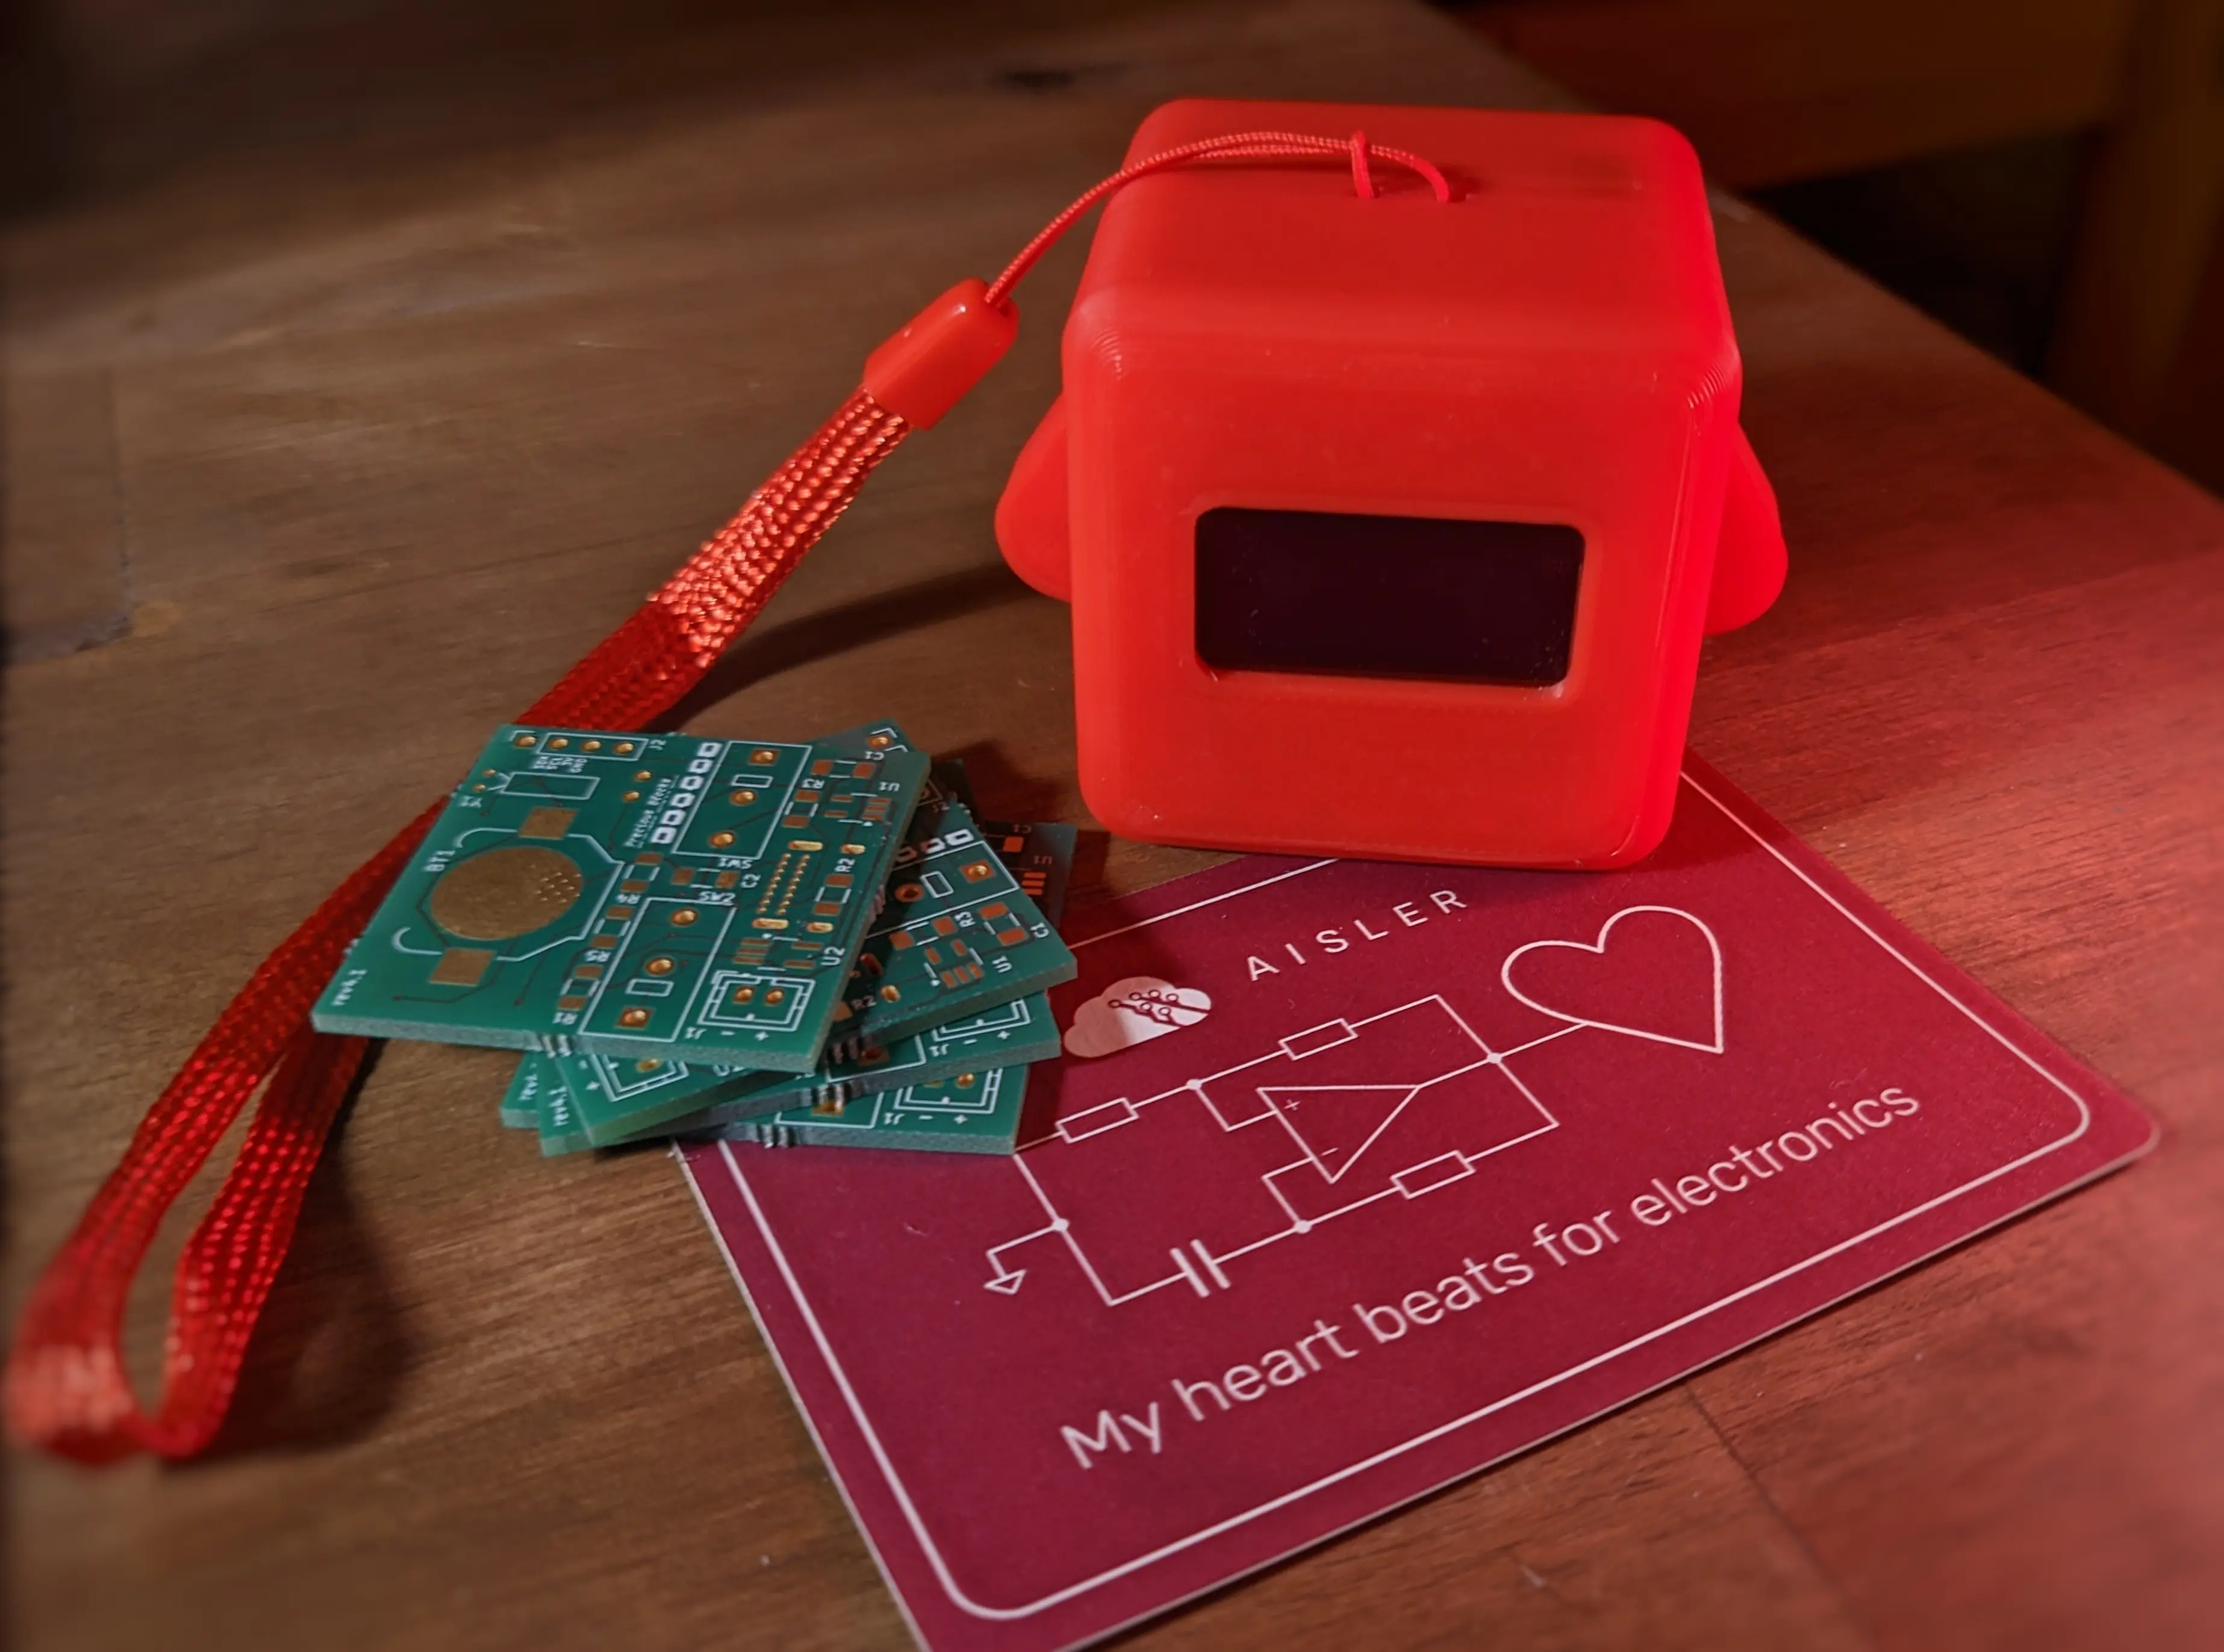
The block is build around a custom-designed PCB, and uses parts that can easily be bought in Europe.
It was designed using KiCAD and you can order it from your preffered PCB manufacturer, by uploading the precious-blocks.kicad_pcb file.
I ordered mine from Aisler and they arrived roughly one week later.
You can use my referral code MakeInEurope-LFKSE for 10€ off you first order.
Parts / BOM
The following parts are required to build the block.
The prices and order-links are as of 26.02.2026, and are intended to be used for reference purposes.
Feel free to source them from different providers or in slightly different variants, as long as they are compatible.
Note
I’m not a fan of buying parts on Amazon, if I don’t have to, but some of the parts are just only easily available over there
| Part | Amount | Order from |
|---|---|---|
| ESP32-S3-WROOM-1U-N16R8 (at least 8MB flash required) | 1 | TME.eu, 6.59€/pc |
| USB4085-GF-A | 1 | TME.eu, 0.83€/pc |
| Microswitch (i.e. D2F-01L) (12.8 x 6.5 x 5.8mm) | 2 | Amazon.de, 0.24€/pc |
| B3U-1000PM button | 2 | TME.eu, 0.86€/pc |
| PCF8523T/1,118 | 1 | TME.eu, 1.04€/pc |
| Keystone 3000 Coin-cell holder | 1 | TME.eu, 0.345€/pc, (min order: 2) |
| CR1220 Coin-cell battery 3V | 1 | TME.eu, 1.56€/pc |
| B2B JST PH-K-S (Battery connector) | 1 | TME.eu, 0.06€/pc |
| STC4054GR | 1 | TME.eu, 1.93€/pc |
| MIC5504-3.3YM5-TR | 1 | TME.eu, 0.162€/pc (min order: 5) |
| 32,768kHz THT oscillator (QT26-32.768KHZF-B) | 1 | TME.eu, 0.61€/pc |
| 0.1uF 1206 SMD capacitor | 2 | TME.eu, 0.46€/pc |
| 1uF 1206 SMD capacitor | 2 | TME.eu, 0.25€/pc |
| 4.7uF 1206 SMD capacitor | 1 | TME.eu, 0.33€/pc |
| 4.7kΩ 1206 SMD resistor | 1 | TME.eu, 0.1€/pc |
| 10kΩ 1206 SMD resistor | 5 | TME.eu, 0.077€/pc |
| 5.1kΩ 1206 SMD resistor | 2 | TME.eu, 0.12€/pc |
| 1027 Mini Vibration Motor (10mm x 2.7mm) | 1 | Amazon.de, 0.38€/pc (min order: 20) |
| SSD1306 0.96“ I2C OLED | 1 | Amazon.de, 7.80€/pc |
| 3.7V Li-Ion Battery (maximum dimensions: ~30x30mm), recommended 400+ mAh, with JST connector | 1 | Amazon.de, 9.6€/pc |
| 2.4GHz FPC Antenna (U.FL / MHF I / AMC connector) | 1 | SeeedStudio, 1€/pc |
Case
Besides all electronic parts, you also have to source the case parts.
The case was designed using FreeCAD, and you can use the project file to export the required models. For your convenience, they have also been included in the repository:
You can print the parts as shown in the photo with 15% infill and without support or brim.
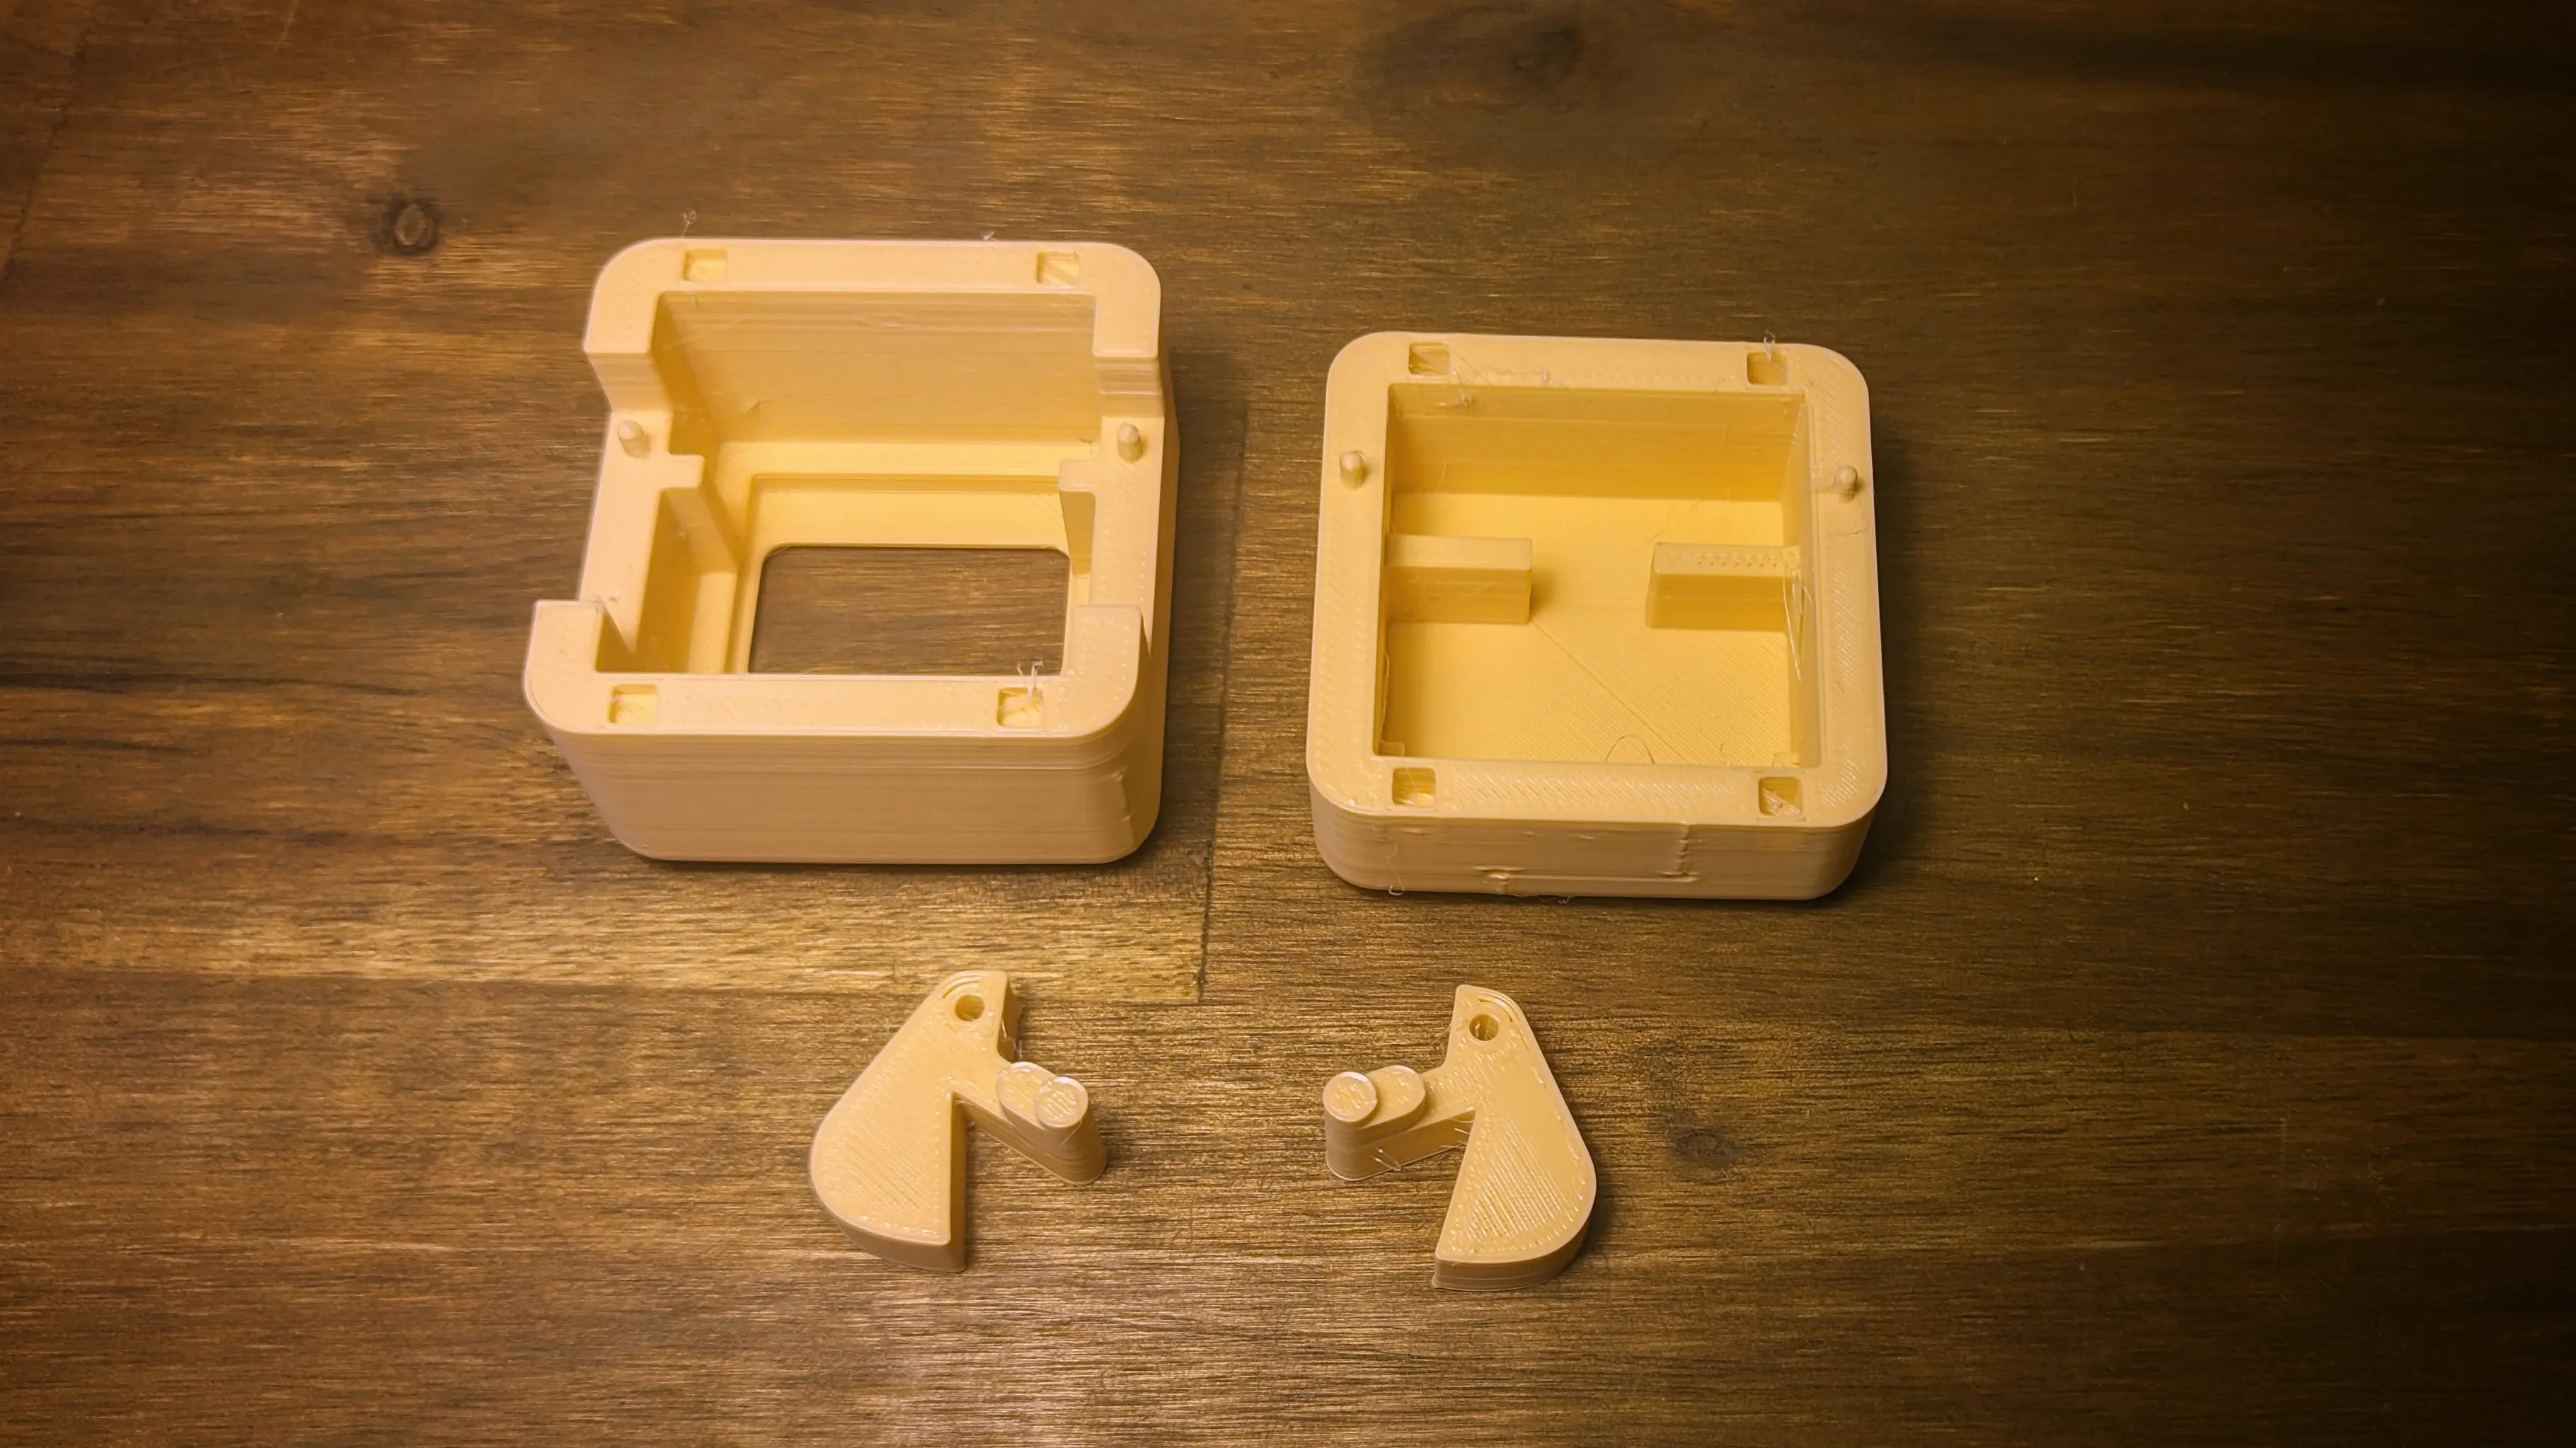
To be able to assemble the case you will also need some magnet cubes, which are used to snap the case shut.
You can also optionally buy a carrying strap (I personally love it, especially to fidget).
Note
I’m not a fan of buying parts on Amazon, if I don’t have to, but some of the parts are just only easily available over there
| Part | Amount | Order from |
|---|---|---|
| 3x3x3mm cube magnet | 8 | magnethandel.de, 0.18€/pc |
| Carrying Strap | 1 | Amazon.de, 3.9€/pc |
If you are looking for filament to order, you can order the Samples from Das Filament (Germany).
The samples are enough to print at least one Precious Block.
You could even buy multiple and print all parts in different colors.